Thursday, November 10, 2011

Shepu Batata Bhaji (Potatoes & Dill)

Dill leaves are also known as 'Shepu' in Marathi and "Suwa" in Gujrati. Dill is an unique plant in which both its leaves and seeds are used as seasoning. They have a distinct soft sweet flavor. A little Dill goes a long way in flavoring any preparation. This in turn saves us pre-preparation chopping time while cooking, which is always an added bonus!

Whenever possible, try and choose fresh dill over the dried form of the herb since it is supposed to be superior in its delicate fragrant flavor.

The recipe I have shared with you below, is one of the basic and easiest one I know. It is so warm and fragrant that you can't help falling in love with this one.


Serves: 3-4 people
Level: Easy

Ingredients:
3 potatoes (medium sized), chopped into medium thin slices
3/4 cup dill (shepu), finely chopped
5 - 6 garlic pods, thinly sliced
6 - 8 dry red chillies, broken
8 - 10 curry leaves
1/2 tsp mustard seeds
1/4 tsp cumin seeds
2 pinches asafoetida
1 tsp urad dal
1/4 tsp turmeric powder
1.5 tblsp oil
Salt to taste

Method:
Step 1 - In a wok, heat some oil. When the oil heats up, add the garlic and saute till it slightly changes color. Add the mustard seeds, cumin seeds, asafoetida, curry leaves and red chillies. Saute for a few seconds. Add the urad dal and let it turn light brown.

Step 2 - Add the turmeric powder and immediately add the potatoes. Saute over medium heat for a good 4 to 5 mins. Cover and let the potatoes cook.

Step 3 - When the potatoes are 50% done, add the dill leaves and saute for 3 to 4 mins. Cook covered for 8 to 10 mins. stirring occassionally till the potatoes are nicely cooked through.

Serve hot, with some nice hot chapatis.


Enjoy!

Tips:
Source: Whole foods, Organic Food Facts etc.
Do not add too much turmeric. You just need a slight yellow tinge to the potatoes.

With dill, you don't have to go plucking each strand on the stalk. Just cut off all the stems, and roughly chop everything together. Dill cooks quickly, so you are not going to taste tough stalks in your preparation anyway.

Dill leaves that are a little wilted are still good to go since they usuallly wilt very quickly. Fresh dill can be stored in the refrigerator wrapped in a damp paper towel. It can also be stored frozen whole or chopped in airtight containers.

Something about Dill:
Dill is native to Southern Russia, Western Africa and the Mediterranean region. But it is extensively grown in North America, India, North Africa and Asia.
The health benefits of Dill include good digestion, relief from insomnia, hiccups, diarrhea, dysentry, menstrual disorders, respiratory disorders etc.
It is also great for oral care.


Tuesday, October 18, 2011

Spicy Garlic Sev

Spicy...Garlicy...Dead Easy!

If you are new to Diwali Faraal and dont know what to start off with...this is the recipe to go!
It is really quick and easy. Needs no experience and a huge bunch can be fried in less than 10 mins.
Having a chakli press is necessary though...

You can season this dish with any of your favorite spices.

Red chilly powder, Black pepper powder and clove powder make the sev spicy.
You can also add in cumin seeds (jeera) or carom seeds (ajwain) to the dough. Just make sure you roughly crush them before adding. I would suggest rolling them with pressure with a rolling pin. We don't want it super fine. But if there are large pieces of spices, it will just fall out into the oil when you fry the sev.

Your chakli press has 2 discs for making sev. Thicker sev and thinner sev, as shown below. Just remember that if you are using the thinner sev disc, try and avoid whole spices as it is difficult to press the sev out of the chakli press and the spices get clogged inside the contraption.

Now let's get started.

Level: Easy
Serves: 8 - 10 people


Ingredients:
2 cups chickpea flour
8 tblsp rice flour
1.5 tsp turmeric powder
2 tblsp garlic powder
2 tblsp red chilly powder
1 tsp black pepper powder
1/4 tsp asafoetida
Salt to taste (I used 2 tsp)
2 tsp clarified butter (ghee) / oil (I used ghee)
Warm Water as required
Oil for deep frying
Thin sev disc

Method:
Step 1 - Take a flat large pan and fill it with an inch of oil. Start heating it on medium high heat.

Step 2 - In a large bowl, measure out the chickpea flour, rice flour, garlic powder, red chilly powder, black pepper powder, asafoetida and salt. Mix it with a spoon or with your hand till everything is incorporated well.

Step 3 - Add in the clarified butter or oil and mix the ingredients well. It should have a crumbly texture, which indicates that you have mixed all ingredients well with the grease.

Step 4 - Now slowly add in the warm water and start kneading it into a dough, similar to a chapati dough. The final dough should be of a soft texture. Check for salt. If you need to add more salt, don't just sprinkle it into the dough. Mix the salt in a tsp of water, heat the water in the microwave for a few seconds. Mix till the salt dissolves well. Add to the dough and knead well again.

Step 5 - Spray the interiors and the rod of the chakli press with some oil spray or just smear some oil with your hand to make sure the dough comes out well and does not stick to the surface.

Step 6 - Divide the dough into 2 parts, mould it into a cylindrical shape and push the dough into the chakli press. Close the contraption in place. The remaining dough needs to be oiled and covered well. We dont want the dough to form scales on the top while it rests.

Step 7 - Let us check the oil now. By now it should be perfectly hot. Take out a pinch of dough from our resting dough and add it to the oil. It should immediately come up and start sizzling. This indicates the oil is ready. Now take the chakli press and start rotating the rod till it starts squeezing the dough out. Holding the press above the hot oil, quickly squeeze out the dough. Keep moving your hand around so the pan is full of sev.

Step 8 - Let the sev fry for 5 - 10 seconds. With the help of tongs, turn the sev over carefully. Fry for another 10 - 12 seconds. Remove off the pan and place on a tissue lined tray. Start next batch. Make sure you do not brown the sev too much.

Step 9 - When the sev has cooled down, just slightly crush them down with the plams of your hand on the tray, so they break down. You can crush them as small or as long as you like them. Store them in an air tight container and gobble away.


Hope you enjoy munching on these.

Tips:
Make sure you are careful when you push down the sev into the hot oil. You dont want the chakli press to fall into the hot oil and splash oil all over you. To avoid this, before you start frying, make sure your hands or the chakli press is not oily.

Use a flat pan to fry these, so you can fry a large batch at one time.

When the dough touches the oil, there will be a lot of bubbles. Slowly the bubbles will start disappearing. This is the indication of the sev being cooked. Don't wait too long for the sev to change color here. They might end up burning.

When I was frying the sev, I did not pile them a lot as my pan was very flat. Due to this my cooking time was just a few seconds. If you have a deeper pan, and can pile your sev together into a heap, don't forget to  increase your frying time.

Saturday, October 1, 2011

Brownies Simplified!

If you are looking for that special, no fuss, complication-free brownie recipe... Look no further!
Here is one simple 'Basic Brownie' recipe for you.

Before we get into brownie variation recipes, it is nice to have a trusted basic recipe on hand.

This recipe is tried and tested, quick and has nothing overly fancy in it, to scare you away from baking these.

Great eaten by itself, these brownies taste better warm, with a dollop of vanilla ice cream or even with just a warm glass of milk.
Sizzling brownies are just a sizzler plate away when you have this easy-breezy brownie recipe.

This recipe makes a brownie which is denser than a cake, yet not too fudgy! Thats how I like it!
You can add a cup of walnuts or pecans in this batter for a nice crunch.

The coffee in the ingredients is optional and is used only to enhance the chocolate flavor. This quantity does not make it a coffee flavored brownie.

This recipe is dedicated to my sister-in-law who is a die hard fan of these beauties! Its her 'to-go' recipe whenever we have guests over.
And it has NEVER failed to impress!

So lets get baking...

Level: Easy
Serves: 6 to 8 people


Ingredients:
200 gms melted butter
1/2 cup unsweetened cocoa
1.25 cups granulated sugar
3 eggs
2 tsp vanilla extract
3/4 tsp instant coffee powder (optional)
1/2 cup plain flour
Pinch of salt

Method:
Step 1 - Preheat oven to 350 deg F. Line a baking dish with parchment paper or a foil and spray it with some cooking oil.

Step 2 - Crack 3 eggs in a bowl and whisk them together. Keep aside.

Step 3 - In a large bowl, add the melted butter, cocoa, coffee powder (if using) and sugar and whisk them together till they all combine.

Step 4 - Add in the eggs and the vanilla extract. Whisk together again till well combined.

Step 5 - Add in the pinch of salt and flour. Replace the whisk with a wooden spoon or spatula and mix in together till well combined. Do not over mix. If you do, the brownies will fall flat while baking and that is not what we are getting at.

Step 6 - Pour the batter into the lined baking dish and place it in the oven for 25-30 mins or till a toothpick inserted in the center of the dish comes out with some moist crumbs.

And we are done!
Chop them into large chunks when they cool down and serve warm or cold.


Happy cooking everyone!

Tips:
I know I am repeating myself here, but do not over mix the batter. We don't want the brownie to be super dense and gooey here. A normal hand whisk works much better than an electric whisk.

If you do not have granulated sugar, you can replace it with normal coarse sugar (regular sugar in India). Just remember that when you add it in the butter in Step 2, you keep whisking it till the sugar blends in.

If you plan to add in some nuts, do so at Step 5, once the flour is well incorporated. And you do not have permission to over mix even here! :)

Saturday, September 17, 2011

Roasted Tomato & Garlic Soup

A thick tomato soup with a mild Italian taste!

Great for cold nights. Quite filling! So makes a meal by itself.
According to me the BEST SOUP to dunk your tough bread in.

Roasting the ingredients gives this soup a heavenly smoky flavor which I am sure you will love.
Adding coriander and garlic and roasting these along with the tomatoes just gives it a punch!
The process is so simple that you wont mind making this soup every time you decide to be good to your body!

Basically, this recipe is for keeps!

Level: Easy
Serves: 4 to 5 people
Adapted from: Sanjeev Kapoor's Khana Khazana


Ingredients:
7-8 medium tomatoes, cut in large cubes
2 bay leaves
10-12 black peppercorns
10-12 stalks of coriander leaves
12 garlic pods
3/4 tsp mixed dried herbs (optional)
2 -3 tblsp olive oil
Salt to taste

Method:
Step 1 - Preheat oven to 350 Deg. F.

Step 2 - In a large baking pan, place the cubed tomatoes, bay leaves, peppercorns, coriander leaves, garlic pods, sprinkle mixed herbs and pour in the olive oil. Try and cover a larger area while pouring in the olive oil. Sprinkle salt over the ingredients.

Step 3 - Bake in the preheated oven for 15-20 mins, or till the coriander stocks wilt and the garlic starts to slightly brown.

Step 4 - Cool the ingredients when they are done baking and blend them all together. Boil and strain the mixture and adjust water and salt as per your personal preference.

Serve hot with some chunky bread!


HEAVEN!

Tips:
This soup is supposed to be on the thicker side. Diluting it a lot could compromise on the taste.

You could add or reduce the ingredients as per your liking.

If you do not want an Italian twist to this soup, do not add in the mixed herbs. The soup by itself also tastes great.

Sunday, September 11, 2011

CKP Mutton/Chicken

Back with a bang!

Being married into a CKP (Chandraseneya Kayasta Prabhu) family, it was inevitable that people started visiting us with expectations of  CKP style non-veg dishes!
CKP families are very well know for their mutton and fish preparations. Though I must say most of the dishes they prepare are time consuming. But trust me, it will be worth every bit of your efforts.

It goes without saying that this recipe is strictly for people who have the patience in cooking or some good help in the kitchen!
Even though I have put the level of this recipe as difficult, it is completely based on the time consumption and not the skill requirement.

With a lot of people who visit us here, being into 'no red meat' diets, this time I have prepared CKP Chicken. But personally I think CKP mutton tastes way better than its chicken counterpart. Those who dont mind eating mutton once in a while, are requested to make a mutton preparation with the same recipe. The only change would be substantial increase in the cooking time in Step 7. There are some tips on reducing the cooking time for mutton preparations right below the recipe.

So lets get started with my family's CKP mutton/chicken recipe.
I have tried to keep it as easy to understand and as step by step as possible. Hope you like it!
Also, just a heads up, the first step has to be done 6 - 8 hrs before you start making this dish. So plan accordingly.

Level: Difficult (Time consuming)
Serves: 6 - 8 people


Ingredients:
1 kg (2.2 pounds) chicken/mutton (bone-in medium sized pieces)

(List 1)
2.5 tblsp ginger garlic paste
1 tsp red chilly powder
1 tsp turmeric powder
1 cup yogurt, slightly beaten

(List 2)
7-8 black peppercorns
5 cloves
2 inch cinnamon stick
1.5 tblsp coriander seeds
2 black cardamoms

(List 3)
2 large onions, finely chopped
1 cup fresh grated coconut/5 to 6 tblsp dry grated coconut (I have used dry in this recipe)

(List 4)
2 cloves
3 black peppercorns
1 green cardamom
1 inch cinnamon
1 large onion, finely chopped

Garnishing:
3/4 tsp garam masala
Juice of 1 lemon
1/2 small bunch of finely chopped coriander leaves

Method:
Step 1 - Wash chicken/mutton thoroughly. Pat dry with a kitchen napkin. Take it in a large bowl with a lid. Apply all ingredients from List 1 (ginger garlic paste, red chilly powder, turmeric powder, yogurt) and salt. Massage all the ingredients well, till the meat is well coated. Cover with a lid or plastic wrap and pop it in the fridge overnight (6 to 8) hours. The yogurt will help tenderize the meat and all the ingredients will flavor the meat well.

Step 2 - In a large pan, take 2 tblsp of oil. Roast all List 2 ingredients. (black peppercorns, cloves, cinnamon, coriander seeds, black cardamom). Drain them out and keep aside in a plate to cool down.

Step 3 - In the same pan, on medium heat add the List 3 ingredients one at a time. Let us start with the onion. Roast the onions till they turn reddish-brown in color. Keep aside. In the same pan, add the coconut and roast it till it becomes a deep brown color. (See picture above). Keep aside. Let all the ingredients cool down.

Step 4 - Grind together all roasted ingredients from step 2 and 3 together with a little warm water, till they form a thick brown paste.

Step 5 - In a heavy bottomed pan heat 1.5 tblsp oil. When the oil is hot, add the List 4 ingredients. Let us start with cloves, black peppercorns, cinnamon stick and green cardamom. Saute for a minute. Add the finely chopped onions and saute for 4 to 5 mins, till they brown.

Step 6 - Add the marinated chicken/mutton (without the excess marination) and saute for a good 8 to 10 mins on a medium to high flame till most of the water evaporates and you have dry meat in the pan.

Step 7 - Add the ground paste of roasted ingredients from step 4 and mix well for 5 to 6 mins. Add some water with the leftover marinade from the meat into the pot and let it all boil together. Adjust water to your desired preference. Also adjust the spice level here by adding some red chillly powder and garam masala. Adjust salt.

Step 8 - When the meat is almost done (chicken takes around 20 mins and mutton about 45 mins to an hour), squeeze in some lemon juice and sprinkle some coriander leaves. Let the meat cook for 5 more minutes till done.


Serve hot. Decorate with some more coriander just before serving.

Tips:
If you are making a chicken preparation, skimping on the marination time is alright. 3 to 4 hrs is good enough. But if you are making a mutton preparation 8 hrs is minimum. You need the meat to tenderize well.

Do not roast the onions and coconut on a high flame. It might burn some of it and that would give the dish a burnt taste.

Make sure the coconut is roasted to a nice brown color. That is what gives the chicken its red - brown color.

For a quicker version of mutton preparation, you can pressure cook the marinated mutton till it is almost cooked through and then use it in the recipe.

Wednesday, August 17, 2011

Appe (Idly Batter)

Let me introduce you to "Appe Patra" or "Appe Pan" or "Appe Skillet".


As you can see, it seems to be similar to a serving dish used for deviled eggs. But dont be fooled!
This pan is extreamly effective for frying with a few drops of oil, without compromising too much on the taste.
The time saved is amazing!!
Do I need to sell this idea anymore?

Where do you get one?
I got mine from India, but I have seen many appe patras in India grocery stores in the USA.
When you are buying the pan, make sure the coating is intact and nothing is chipped or scratched.
I dint get one, but a pan with a handle would be much more convenient to use while you make appe.

Let me introduce you to appe with a very simple idly variation!
You can make a whole lot of amazing bite sized appe in this pan...but let us go there one step at a time.

I have served my appe with chana dal and coconut chutney! You can serve them with any chutney you like or even with ketchup if you are time pressed.

Here is how you make idly appe!

Level: Simple
Serves: 6 to 8 people


Ingredients:
1 box of idly batter (I used ready made 'Shashta' Batter)
2 inches ginger, finely chopped
1 tblsp cumin seeds
3 - 4 green chillies, finely chopped
Salt if not already added in the idly batter

Method:
Step 1 - Take all the idly batter in a bowl. Add ginger, green chillies and cumin seeds. Mix well.

Step 2 - Heat the 'appe patra'. When hot, drop 1 drop of oil in each depression. Immediately drop 1 tblsp each of the batter into each depression in the pan. Do not let the batter overflow. You need to add batter till it reaches the rim of each depression. Cover the appe pan for 2 - 3 mins. The appe are done when the tops are no longer liquid and the batter stops sticking to the pan. Each appe should easily flip over with a wooden spoon.

Step 3 - Once flipped, keep the appe pan open and let the bottoms cook for another 2 - 3 mins.

Take them onto a pan and serve them with your favorite chutney or ketchup!

Tips:
Make sure the pan is hot when you start pouring batter into the appe pan.
Do not use metal objects to flip appe in an appe pan. It chips the coating.

You can of course use homemade idly batter. Gits or MTR ready to make idly/medu wada batters also work well.

Wednesday, August 10, 2011

Tea Rusks

An effortless recipe!

A great and crunchy tea time snack!

Too few ingredients needed!

An awesome way to use up leftover bread. (Burger Buns in my case)!

Need I say more?

With such an effortless recipe, I should not take efforts of writing any more description here!
So here is the super quick recipe for all of u!

Level: Easy
Serves: 5 - 6 people

Ingredients:
2 Burger Buns (No toppings)
Sugar to taste (I used 1 pinch per piece)
Butter (Any kind)


Method:
Step 1 - Preheat oven to 270 Deg F

Step 2 - Separate each slice of the burger bun, if it is not pre-cut and smear butter or any butter-like spread over the top of each piece. Do not go over board here, but you do need to cover the entire top of the bread with butter.

Step 3 - Cut each slice into 2 or 3 lengthwise pieces. Sprinkle each piece with a pinch of granulated sugar. Arrange them on a baking tray.

Step 4 - Bake in the oven for 25-30 mins. Keep an eye on the beauties after 20 mins to avoid burger burns!

Let them cool.

Dip in some nice hot tea or coffee and enjoy!

Tips:
You can use any type of bread here. Just make sure you adjust the time taken in the oven based on the thickness of the bread.
Thinner bread = lesser time and vice versa.

Toppings are a no-no here, as they burn up in the oven. Sad personal experience!

Wednesday, August 3, 2011

Chickpea Crostini

Anyone up for some super cute, super healthy and super simple appetizer for your party? Look no further!

Chickpea Crostini is the perfect 'hummus-like' appetizer option when you have to serve a whole lot of people and don't have too much time to pull things together!
You just get the bread sliced before hand, make the topping a day ahead if you are in a super time crunch and fix things together in no time!
Then just sit back and enjoy the compliments!

Here is what you need to get this ready...

Serves: 8 to 10 people
Level: Simple
Adapted from: http://www.laurainthekitchen.com/arch/chickpea_bruschetta.html


Ingredients:
2 cans Garbanzo beans (I used the ones with 50% less sodium)
1/2 medium bunch cilantro/coriander leaves, finely chopped
Juice of 1 lemon
2 tblsp extra virgin olive oil
Salt to taste
Pepper to taste
Red chilly flakes to taste
Garlic powder to taste*
Fresh thin long baguette/sour dough bread, sliced into tiny rounds

Method:
Step 1 - Drain out the garbanzo beans from the can and thoroughly wash the beans under running water.

Step 2 - In a bowl, add the garbanzo beans, salt, pepper, red chilly flakes, cilantro and olive oil. Mix everything together. Squeeze the lemon. Mix again. The mixture should be spicy and tangy. Then with the back of a fork or with a vegetable masher, mash the chickpea mixture together. You do not want to make this into a paste. It needs to be chunky! You should be able to see a few whole chickpeas in the topping.

Step 3 - Line a baking tray with foil. Place the tiny bread rounds onto the tray. Bake this in a preheated 400 Deg. F. oven for 10 mins. Keep an eye on these. You dont want to burn off the bread here. Once done, while the bread is still hot, sprinkle the slices generously with garlic powder. Top the bread with our chickpea topping and serve!

Hope you enjoy this super fun treat!

Tips:
- You can smear each bread piece with a little butter before putting them in the oven for a buttery crunchy crust!
- To make this dish more "zingy"! you can squeeze some drops of lemon juice over the prepared crostinis just before serving!
- I had some of my friends eating this topped with some Sriracha sauce/Tabasco!
- For the original recipe and a whole lot of amazing recipes visit the link provided above!

Saturday, April 9, 2011

Shevayanchi Kheer (Vermicelli Porridge)

One of the most homely dessert I know!
This dessert is a quick sweet dish that can be had hot or cold. The ingredients being so simple and regular, this kheer can be made quickly without much pre-planning.

You can find two kinds of vermicelli in stores. One is the plain variety and one is the roasted variety. I have not had great results with the roasted variety, so I generally stick to the plain vermicelli. Moreover it is super simple to roast these. So why bother!

Don't forget to read the few tips right below the recipe before you get started.

Here is how to make this quick dessert.

Serves: 6 to 8 people
Level: Simple


Ingredients:
3/4 tsp clarified butter (ghee/tuup)
1 cup vermicelli
5.5 cups milk (I used 2%)
1/2 tsp cardamom powder
2 pinches saffron (optional)
12 tblsp sugar (or to taste)
4 tblsp chopped or sliced nuts (I used almonds)

Method:
Step 1 - In a heavy bottomed pan, heat some clarified butter on medium heat. Add the vermicelli and roast these till they turn to a light brown color. Keep constantly stirring else you might burn the vermicelli, which can totally ruin the taste of the kheer.

Step 2 - Add the milk slowly and bring it to a boil. Keep stirring the mixture slowly and regularly. When the milk comes to its first boil, add the saffron, sugar and 3 tblsp chopped nuts. Boil for 15 mins. Do not forget to stir. You don't want the milk to burn at the bottom.

Step 3 - After the 15 mins sprinkle some cardamom powder and stir well.

Serve hot, warm or cold dressed with the remaining 1 tblsp chopped nuts!

Heavenly!


Tips:
You don't want to use more than the stated quantity of clarified butter. Unfortunately it creates an oily cover over the top surface of the kheer.

If you have roasted vermicelli at home, don't go hunting for plain vermicelli. Just add them together with the milk and continue with the remaining process.

If you are using cashew nuts and not almonds like I did, roast them in the clarified butter in step 1.

I actually time the 15 mins boiling. This gives it a perfectly thick consistency when the kheer cools down.

As the kheer cools down, the vermicelli soaks in a lot of milk. If you want a thinner consistency kheer, add milk and bring it to a boil once before serving.


Wednesday, April 6, 2011

Rava Ghavne (Maharashtrian Semolina Crepes)


A great quick variation to the regular dosa. No overnight fermenting, no grinding, no messing over perfect consistencies! What more could you ask for!

Have this with some sambhar or chutney or even plain old ketchup. This hits the spot every time.

Though the consistency of this batter is not a huge deal breaker, just like crepes, the batter here needs to be on the thinner side. 
You can adjust the seasonings and add or miss any of the veggies based on your personal preferences. This combination is my favorite as it has ingredients that are always available at my home.

So lets get cooking...

Level: Easy
Serves: 12-15 medium sized crepes


Ingredients:
1 cup semolina (any variety)
3/4 cup yogurt, well beaten
2 pinches baking soda
1 small onion, finely chopped
1/2 small bell pepper, finely chopped (optional)
2 - 3 green chillies, finely chopped
1 inch ginger, finely chopped
4 - 5 tblsp cilantro, finely chopped
Water as required
Salt to taste
2 tsp oil
1 tsp cumin seeds
3 pinch asafoetida
Oil for pan frying

Method:
Step 1 - Take semolina in a bowl and add in the beaten yogurt. Mix well. Add water slowly, stirring or whisking continuously to avoid lumps. Add water till the batter reaches a thin consistency. Cover and keep aside for 30 mins.

Step 2 - By now, the semolina would have softened and the batter would be thick. Add in the onions, bell peppers (if using), green chillies, ginger, cilantro and the baking soda. Mix well and add water to adjust the batter to a thin consistency again.

Step 3 - In a small skillet, add in the 2 tsp oil and let it heat up. Once the oil is hot, add in the cumin seeds. When the cumin seeds get brown, turn off the heat and add in the asafoetida. Quickly pour this into the batter and mix well.

Step 4 - Heat your frying pan. Once hot, add in a few drops of oil. Swirl your pan around, so the oil coats the surface of the pan. Pour in a laddle of the batter and cover the pan. In 2 -3 mins, check the bottom of the crepe. If it is brown, flip the crepe over and let this cook uncovered for 2 more mins. 

Serve hot with some chutney or ketchup or sambhar.


Happy cooking everyone!

Tips:
The batter needs to be thin and not thick. Thicker batter wont spoil your Rava Ghavan, but it will just look different and will be slightly puffy. Remember, thin batter = thin crepes!

For the first crepe, you may want to use a little more oil to avoid it from sticking. Once you are done with a couple of crepes, you will not need more than a few drops of oil to pan-fry these.

Make sure you stir the batter well before pouring it into your pan. Semolina tends to settle at the bottom of the bowl very quickly.


Tuesday, March 29, 2011

Varan

After a lot of requests for typical Maharashtrian Daals and Amtis, I thought I should start from the basics.
Moreover if I don't include "Varan" in the Soul Food tab, the whole concept of "Soul Food" gets challenged..:)

Varan is a real basic maharashtrian style daal. It is always a part of a traditional maharashtrian thali. Any offering given to God, has to have Varan in it's menu. It is also a regular in traditional maharashtrian style weddings. (Lagnachi pangat).

The most authentic way to eat this Varan is "Varan-Bhaat-Tuup-Limbu". Which translates to "Varan-rice-clarified butter(ghee)-lime".
So you take some hot fresh rice on your plate. Laddle in some Varan. Add about a teaspoon (or more if you dare) of ghee and squeeze a little lime. Mix it all together and gobble away.
The most important step to remember is to eat this while it is hot!

Level: Easy
Serves: 4 - 6 people

Ingredients:
1 cup tur daal
3 pinch asafoetida (hing)
3/4 tsp turmeric powder
Salt to taste
1 large marble sized jaggery (or to taste)
Water as required

Method:
Step 1 - In a pressure cooker safe bowl, add the tur dal and wash well till the water runs clear.

Step 2 - Add 2 cups of water to the bowl, the asafoetida, turmeric powder and 3/4th tsp of salt. Pressure cook for 3 whistles or for as much time your pressure pan takes to cook lentils. You want to overcook the lentils here. They should all just mash and blend in together.

Step 3 - Once the pressure is all released, take out the bowl carefully from the pressure pan and mash the daal to a smooth puree like consistency. You could use a masher or a whisk here. The lentils being over cooked don't take long to break down.

Step 4 - Pour this puree into a larger pot and start heating it again. Add water till it reaches the consistency you desire. Generally Varan is supposed to have a thicker consistency. But you can add water based on your personal preferences. Add the jaggery and adjust salt. Boil for just 5 more mins.

Serve hot with some rice, tuup and limes.


Perfect!

Tips:
Varan is supposed to have a thicker consistency than the other maharashtrian daals you will come across.

When you are pressure cooking the tur daal in the pressure cooker/pan, make sure you cover the bowl. You don't want the daal to boil over and mess up the entire pressure pan.

Some families like to have a bit of tur daal in the varan and do not enjoy it completely pureed. In this case do not overcook the lentils and just slightly mix them together once they cook.

Rack your brains:
In India split pigeon peas (tur daal/toor daal) is one of  the most popular pulses.
They are an important source of protein in a mostly vegetarian diet.

Along with high levels of proteins, they also contain the important amino acids methionine, lysine and tryptophan.

Monday, March 28, 2011

DB Challenge # 1 "YEASTED MERINGUE COFFEE CAKE"

The March 2011 Daring Baker's Challenge was hosted by Ria of Ria's Collection and Jamie of Life's a Feast. Ria and Jamie challenged The Daring Bakers to bake a Yeasted Meringue Coffee Cake.


Our Verdict: Loved it....almost got over my fear of using yeast! Great when you dunk it in some hot fresh coffee or tea. Made my first Bread...YEY!
Mine did look pretty, but not as pretty as Ria's Cake...:)

My Take: I made Jamie's sweet chocolate nut version sans cinnamon (not a big fan). I halved the recipe. This being my first challenge and first time using yeast in a recipe, did not try any innovative ideas which were popping in my head. Only change I made was, instead of using  pecans I replaced them with sliced almonds, as I had them readily available.

Mandatory Items: Sweet Yeast Dough for the Coffee Cake and the meringue

Preparation time:
For the dough:
10 - 15 minutes preparation of the dough
8 – 10 minutes kneading
45 – 60 minutes first rise
10 – 15 minutes to prepare meringue, roll out, fill and shape dough
an additional 45 – 60 minutes for second rising.
Baking time: approximately 30 minutes
Equipment required:
Measuring cups for dry ingredients
Measuring cup for liquid
Measuring spoons
Cutting board and sharp knife for chopping nuts & chocolate if using
2 large mixing bowls
1 small mixing bowl
1 medium mixing bowl for beating egg whites, preferably plastic or metal
1 medium saucepan
Electric mixer or stand mixer
Wooden spoon
Rolling pin
Spatula
Clean kitchen scissors or sharp knife
Plastic wrap & clean kitchen towel
Parchment paper
2 medium-sized baking trays (or 1 large if your oven is large enough)
Cooling racks
Serving platter
Vegetable oil to grease bowl


FILLED MERINGUE COFFEE CAKE
Makes 2 round coffee cakes, each approximately 10 inches in diameter
The recipe can easily be halved to make one round coffee cake
Ingredients
For the yeast coffee cake dough:
4 cups (600 g / 1.5 lbs.) flour
¼ cup (55 g / 2 oz.) sugar
¾ teaspoon (5 g / ¼ oz.) salt
1 package (2 ¼ teaspoons / 7 g / less than an ounce) active dried yeast
¾ cup (180 ml / 6 fl. oz.) whole milk
¼ cup (60 ml / 2 fl. oz. water (doesn’t matter what temperature)
½ cup (135 g / 4.75 oz.) unsalted butter at room temperature
2 large eggs at room temperature
For the meringue:
3 large egg whites at room temperature
¼ teaspoon salt
½ teaspoon vanilla
½ cup (110 g / 4 oz.) sugar
For the filling:
Jamie’s version:
1 cup (110 g / 4 oz.) chopped pecans or walnuts
2 Tablespoons (30 g / 1 oz.) granulated sugar
¼ teaspoon ground cinnamon
1 cup (170 g / 6 oz.) semisweet chocolate chips or coarsely chopped chocolate
Egg wash: 1 beaten egg
Cocoa powder (optional) and confectioner’s sugar (powdered/icing sugar) for dusting cakes.
Directions:
Prepare the dough:
In a large mixing bowl, combine 1 ½ cups (230 g) of the flour, the sugar, salt and yeast.
In a saucepan, combine the milk, water and butter and heat over medium heat until warm and the butter is just melted. 
With an electric mixer on low speed, gradually add the warm liquid to the flour/yeast mixture, beating until well blended. Increase mixer speed to medium and beat 2 minutes. Add the eggs and 1 cup (150 g) flour and beat for 2 more minutes.
Using a wooden spoon, stir in enough of the remaining flour to make a dough that holds together. Turn out onto a floured surface (use any of the 1 ½ cups of flour remaining) and knead the dough for 8 to 10 minutes until the dough is soft, smooth, sexy and elastic, keeping the work surface floured and adding extra flour as needed.
Place the dough in a lightly greased (I use vegetable oil) bowl, turning to coat all sides. Cover the bowl with plastic wrap and a kitchen towel and let rise until double in bulk, 45 – 60 minutes. The rising time will depend on the type of yeast you use.
Prepare your filling:
In a small bowl, combine the cinnamon and sugar for the filling if using. You can add the chopped nuts to this if you like, but I find it easier to sprinkle on both the nuts and the chocolate separately.

Once the dough has doubled, make the meringue:
In a clean mixing bowl – ideally a plastic or metal bowl so the egg whites adhere to the side (they slip on glass) and you don’t end up with liquid remaining in the bottom – beat the egg whites with the salt, first on low speed for 30 seconds, then increase to high and continue beating until foamy and opaque. Add the vanilla then start adding the ½ cup sugar, a tablespoon at a time as you beat, until very stiff, glossy peaks form.
Assemble the Coffee Cakes:
Line 2 baking/cookie sheets with parchment paper.
Punch down the dough and divide in half. On a lightly floured surface, working one piece of the dough at a time (keep the other half of the dough wrapped in plastic), roll out the dough into a 20 x 10-inch (about 51 x 25 ½ cm) rectangle. Spread half of the meringue evenly over the rectangle up to about 1/2-inch (3/4 cm) from the edges. Sprinkle half of your filling of choice evenly over the meringue (ex: half of the cinnamon-sugar followed by half the chopped nuts and half of the chocolate chips/chopped chocolate).

Now, roll up the dough jellyroll style, from the long side. Pinch the seam closed to seal. Very carefully transfer the filled log to one of the lined cookie sheets, seam side down. Bring the ends of the log around and seal the ends together, forming a ring, tucking one end into the other and pinching to seal.


Using kitchen scissors or a sharp knife (although scissors are easier), make cuts along the outside edge at 1-inch (2 ½ cm) intervals. Make them as shallow or as deep as desired but don’t be afraid to cut deep into the ring.
Repeat with the remaining dough, meringue and fillings.
Cover the 2 coffee cakes with plastic wrap and allow them to rise again for 45 to 60 minutes.
Preheat the oven to 350°F (180°C).
Brush the tops of the coffee cakes with the egg wash. 


Bake in the preheated oven for 25 to 30 minutes until risen and golden brown. The dough should sound hollow when tapped.

Remove from the oven and slide the parchment paper off the cookie sheets onto the table. Very gently loosen the coffee cakes from the paper with a large spatula and carefully slide the cakes off onto cooling racks. Allow to cool.


Just before serving, dust the tops of the coffee cakes with confectioner’s sugar as well as cocoa powder if using chocolate in the filling. 


These are best eaten fresh, the same day or the next day.

Saturday, February 26, 2011

Bharleli Simla-mirchichi Bhaji (Stuffed Green Peppers)


VADA-PAAV CRAVINGS!

Well this is a very common feeling at any maharashtrian home...or may I say a Mumbaikar's home. But the guilty feeling after eating a whole lot of vada-paavs...not so cool afterall!
So to reduce the guilt and to still enjoy it's flavor at the same time, we make the vada paav filling and use it in innovative non-fried ways!

Sometimes, we use it as a sandwich filling...sometimes in puff pastries...and sometimes in stuffed green peppers!

So here is the recipe for all you guilty vada-paav fans. Nothing beats a vada-paav, but trust me your cravings would be in check.....for a little more time...:)

P.S. Don't forget to read through the tips right at the bottom of this post before you get on to making this rocking recipe!

Serves: 3 to 4 people
Level: Medium


Ingredients:
6 anaheim peppers
3 large potatoes, boiled and mashed
Oil
3/4 tsp mustard seeds
2 pinches asafoetida
4 curry leaves
3 green chillies, chopped finely
1/2 tsp turmeric powder
1/2 medium onion, finely chopped
Salt to taste
Coriander to decorate

Method:
Step 1 - Heat some oil in a pan. Add mustard seeds and let them splutter. Add asafoetida, curry leaves and green chillies. Stir for a couple of seconds.

Step 2 - Add in the turmeric powder. Saute it for a couple more seconds. Do not let the turmeric turn brown or burn here. Immediately add in the onions. Saute for 5 mins, till the onions start changing color.

Step 3 - Add in the potatoes and salt. Mix well till everything is incorporated. Sprinkle some coriander on it. Take off heat and let the mixture cool down.

Step 4 - Wash the anaheim peppers well, cut off the head and make a slit on one side and gently scoop out the seeds. Make sure you dont cut the peppers in half here. Wash the peppers again and pat them dry.

Step 5 - Stuff the potato mixture from step 3 generously. (There will be excess potato mixture. Do not discard it.)

Step 6 - In a flat pan, heat 2.5 to 3 tblsp oil. On medium heat, place in the peppers, open potato side down for 5 mins. Do not disturb them a lot. Once the potatoes get browned, turn them over, reduce heat to low. Cover the pan with a lid and let the peppers cook on low heat for 10 mins or till they are soft and almost done. When you notice the peppers are almost ready (90% done), place the excess potato from step 5 into all the gaps in the pan. Cover and let it cook.

Serve hot with some hot chapatis!


Happy cooking everyone!

Tips:
Make sure you cook the peppers on low heat, else they char from one side and remain raw on the other! You really cannot rush this preparation.

You don't have to go in search of anaheim peppers. You could use normal bell peppers too. Over time, I just noticed that anaheims are the quickest to cook, especially in the US, mainly because the bell peppers we get around here have a really thick cover, which is not too ideal for this preparation.

Try and get peppers of the same size. They end up all cooking beautifully together.

Do not cut down on the oil here. Too little oil, will end up burning everything in the pan.

Handle the peppers very gently when they are cooked. They could break very easily ending up looking really messy, but will taste awesome none-the-less.


Tuesday, February 15, 2011

Apple Pickle

Loads of apples, too tart to be enjoyed as a snack, not in a mood for an apple dessert! Believe it or not, this happens too often at our place.

Try searching for recipes with apples and google throws at you all the delicious tarts and pies and cakes. Just looking at the pictures makes you crave some calories. But with a lot of self control I typed in "apple savory recipes" and saw amazing images of apple pickles.
How interesting! But wouldn't it be all mushy and pulpy? The recipe claimed it did not. We weren't going to eat those tart apples anyway and the recipe looked too simple to be true. I decided that there was no harm in trying some apple pickle. And I was glad I did!

It almost tasted like Raw Mango pickle, just a tad bit sweet. This can be taken care of by addition of some white vinegar. I think its a must try! Maybe next time, I'll buy apples just to make some pickle!

Moreover, making homemade pickles has its own advantages. Firstly, I think it is super exciting to eat a fresh homemade pickle. Secondly, you can totally control the salt and oil getting into this. So great for calorie conscious or High Bloop Pressure candidates.

Just make sure you read the tips, right below the recipe before you try this apple pickle.

I say.. just go for it!

Level: Easy
Serves: 5 to 6 people ( If eaten as a pickle)


Ingredients:
3 medium green apples, chopped into tiny cubes
2 tsp red chilly powder
1 tsp fenugreek powder
3 pinches asafoetida
2 tsp vinegar
Salt to taste
3/4 tsp mustard seeds
2 tsp oil

Method:
Step 1 - Place the chopped apples in a large bowl. Add red chilly powder, fenugreek powder, 2 pinches asafoetida and salt. Mix well and adjust flavors to your taste. Leave this to marinate for 3 to 4 hours.

Step 2 - In a small pan, heat some oil. When the oil heats up, add in the mustard seeds and 1 pinch asafoetida and let them splutter. Immediately pour this into the apples and stir well.

If at this point, you think you need the pickle to be slightly sour, add in some vinegar and mix well.


Hope you enjoy making and eating this!
Happy cooking everyone!

Tips:
I used green apples, but there are recipes which have used red apples for pickles too.
Few recipes, call for peeling the apples before chopping, I did not do that. I think it looks prettier and holds shape better if we leave the apples skin-on.

Once you wash the apples before chopping them, make sure you wipe them dry with a tissue paper or a cloth. You want the apples to be as dry as possible. Water content, makes the pickle go bad quicker.

After chopping the apples, immediately go to Step 1. You dont want to wait for the apples to get discolored.


Saturday, February 5, 2011

Spring Onion Soup

Spring Onion Soup is a very mild soup. It can soothe any soul!
Every sip gives you the fresh ginger and slight garlic taste and a nice crunch of spring onions. Personally I think this combination totally rocks!

I got this recipe online. You can also go to the site below to check out the soup in its original form, as I have tweaked it slightly to our liking. Am sure it tastes equally good both ways. The only change I have made is substantially reduced on the butter and added some dried herbs and chilly flakes. 

Here is how I made it.

Serves: 4 to 5 people
Level: Easy
Adapted from: http://treat4all.blogspot.com/


Ingredients: 
2 cups spring onions, finely chopped
1 tsp fresh ginger, grated
1 tsp fresh garlic, grated
3/4 tblsp butter
Pinch of salt
1 tsp pepper

For white sauce:
1 tblsp butter
2 tblsp all purpose flour/maida
3 cups milk, I used 2%
1/4 tsp sugar
Salt as per taste
1 tsp red chilly flakes
1/2 tsp dried herb, I used oregano

Method:
Step 1 - Let us prep the spring onions first. In a medium sized pan, heat 3/4th tblsp butter. When it starts slightly bubbling, add in the grated ginger and garlic. Saute till they slightly change color. Do not let this burn. 

Step 2 - Add in the chopped spring onions and saute for 3 to 4 mins till they slightly wilt. We dont want to completely cook these. They have to retain their shape and crunch. Add salt and pepper. Mix well. Keep aside in a plate.

Step 3 - Lets get to the white sauce now. Take a pot and heat 1 tblsp butter in it. As soon as it melts, lower the heat and add in the all purpose flour, stirring continuously till it slightly changes to a light brown color. Again, do not let this burn or stick to the bottom of the pan.

Step 4 - Add in the milk, slowly and steadily, stirring continuously. Make sure there are no lumps. Add in the sugar, red chilly flakes, oregano and the spring onions from step 1 and 2. Mix well. Adjust taste by adding salt and pepper.

Serve piping hot.
I served this soup with some rustic sourdough bread for dunking. A great combo deal!

Tips:
To avoid lumps in your white sauce, use a whisk and stir briskly when you add the milk. Add milk really slowly.

You can add green chillies in step 1 to spike the soup up a bit.

Dont keep boiling the soup for too long. The spring onions might just lose their texture.

Once the soup starts cooling, it will thicken because of the all purpose flour. Just add in some water to thin it and bring it to a boil. As fresh as new!

Wednesday, February 2, 2011

Spiced Carrot Tomato Soup

Continuing with our once a week soup diet, I exhausted almost all the soup recipes I had with me. This is when I started looking up easy soup recipes. Well, it has to be easy else it never gets made!
Have written down a couple of them, but the carrot and tomato soup just caught my eye. It looked beautiful, bright and appetizing. Unfortunately for my taste, it sounded quite bland. So I decided to give it my own twist.

So for all you thin and spicy soup lovers out there, this is for you!

Level: Easy
Serves: 4 people


Ingredients:
2 large carrots, roughly chopped
2 medium tomatoes, roughly chopped
Salt as per taste
Pepper as per taste
1 tsp oil
3/4 tsp cumin seeds
1 inch cinnamon stick
4 cloves
4 black peppers
1 bay leaf
Water as required

Method:
Step 1 - Place the chopped carrots and tomatoes in a pressure cooker. Add water till it is half way to the vegetables. Pressure cook for 2 whistles or till the vegetables are well done.

Step 2 - Once the vegetables cool down, blend them with the water they are in, to form a smooth paste. Strain this mixture.

Step 3 - In a pot, heat oil. Add cumin seeds, cinnamon, cloves, black pepper, bay leaf and salt. When the cumin seeds change color, pour in the strained carrot-tomato mixture. Add water till the soup reaches your preferred consistency.

Serve piping hot, with a sprinkle of pepper.

I served this with the tomato - mint bruschetta. Just perfect!

Tips:
If you are uncomfortable with consuming the whole spices in your soup, you can also strain the soup into soup bowls while serving. This will give it all the flavor and no spicy crunch in between sips.

The original recipe does not add the spices. So if you want to keep it nice and simple. Skip step 3. Just reheat the strained mixture with water and salt. Serve with a sprinkle of pepper. Done!

Happy cooking everyone!


Saturday, January 22, 2011

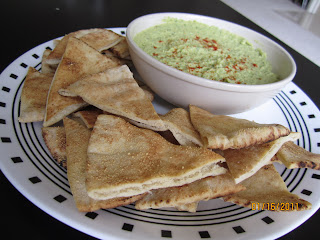
Toasted Garlic Pita Chips

A really healthy and almost effortless pita chips recipe, to go with your hummus!

Level: Easy
Serves: 32 pita triangles


Ingredients:
4 pita pockets, any kind
Oil/Butter spray, I used canola
4 tblsp garlic powder, or as per taste

Method:
Step 1 - Cut the pita pockets into 8 triangular pieces each. I just cut them with a kitchen scissor. It is easier this way.

Step 2 - Place all the pita triangles on a baking sheet. Try to avoid over-lapping as much as possible. But dont spend too much time on this. 

Step 3 - Spray oil over the pita triangles. Sprinkle the garlic powder over it.

Step 4 - Bake in a preheat 375 Deg F. oven for 12 to 15 mins. Keep an eye on this, making sure the pita does not burn.

Serve with hummus!


These pita triangles are quite crunchy. But if you would like them to be crunchier, almost wafer like, after cutting the pita pockets into triangles, open the pockets and follow the same steps above. But remember to reduce your baking time to half. This will yield crunchier 64 pita triangles.


Enjoy!