Showing posts with label Desserts. Show all posts

Wednesday, October 30, 2013

Baked Karanji, a healthier take on deep fried heaven!

'Karanji' is a traditional Maharashtrian sweet prepared during the festival of Diwali. This dessert has soft sweet coconut warmly wrapped with crunchy pastry.

There are two reasons why Baked 'karanji' are a blessing during Diwali. Firstly, they are a lot healthier than the traditional fried version and secondly they save a lot of time. You don't have to fry them one or two at a time, all of them get baked together! With so much to do during Diwali, a healthier sweet which saves time is always a win-win.

Similar versions of the 'Karanji' called 'Gujiya','Ghugra', 'Kajjikayalu', 'Karchikkai' and many more are prepared all over India. The fillings keep changing with changing regions, but the basic concept remains the same.
Today's recipe is a healthier take on the Maharashtrian version of the 'Karanji'. You can use my recipe or your family's recipe for the filling. But I have narrowed down on the outer cover recipe after trying a couple of online recipes last Diwali. So just go with it! Also, if you have a better version with you, please feel free to share it with all of us.

Before we start, I should mention that Baking the 'karanjis' does not make this dessert calorie free, so maintain caution while indulging in this addictive dessert!

Level: Medium
Serves: 15 - 16 medium sized karanjis
Source: Madhura and Sudha Kulkarni's Microwave cookery guide


Ingredients:
For Cover:
3/4 cup all purpose flour
2 tblsp tuup/clarified butter
2 tsp cornflour
Pinch of salt
Cold milk for kneading, as required

For Filling:
1 tsp poppy seeds
1 tsp semolina, any variety
1 cup desiccated coconut
1 cup powdered sugar
1/4 tsp cardamom powder
Nuts and raisins, optional

Method:
Cover:
Step 1 - In a bowl, mix together the cornflour, tuup and salt till it forms a smooth creamy paste. Do not rush here. Do this for at least a couple of minutes.

Step 2 - Add the all purpose flour and mix well with your fingers, till it resembles bread crumbs.

Step 3 - Add cold milk a couple of tablespoons at a time and knead it to form a dough. The dough should be a little stiffer than your regular chapati dough. But don't lose your head over the consistency here. Just make sure it isin't too soft. Keep covered for 15 mins.

Filling:
Step 1 - Dry roast the poppy seeds, till they slightly change color. Keep aside to cool.

Step 2 - In the same pan, dry roast the semolina till it slightly changes color. Keep aside to cool.

Step 3 - In a large bowl, mix together the coconut, powdered sugar, cardamom powder, nuts and raisins if you are using and the cooled roasted poppy seeds and semolina.

Assembly:
Step 1- Divide the dough into 1/2 inch round balls. Roll out the dough balls into thin discs. Use some dry all purpose flour, if the dough is sticking to the rolling board.

Step 2 - Place a tablespoon of the filling in the center of the rolled out disc. Apply milk on half of the border. This will act as a glu to hold the shape in place. Carefully flip one end of the disc onto the other to form a half moon shape. Press the joint well. Cut off the corners with a Karanji cutter or a pizza cutter for a perfect finish.

Step 3 - Place the prepared 'karanjis' on a foil lined baking tray and place it in the refrigerator for 30 mins.

Step 4 - Preheat oven to 350 deg F. Bake the 'karanjis' for 7 - 8 mins or till they are golden brown. Keep a watchful eye here as every oven works differently and you do not want to end up with burnt karanjis.

We are done!

Hope you enjoy these 'karanjis' as much as we do!

Happy Diwali Everyone!

Thursday, August 29, 2013

Bharli Keli for Gokulashtami (Stuffed Bananas)

'Gokulashtami' or 'Krishna Janmashtami' is an annual commemoration of the birth of the Hindu deity Krishna - the eight avatar of Lord Vishnu.
Hindus celebrate this festival by fasting and staying up until midnight, the time when Krishna is believed to have been born. Images of Krishna's infancy are placed in swings and cradles in temples and homes. At midnight, devotees gather around for devotional songs, dance and exchange gifts. Some temples also conduct reading of the Hindu religious scripture - 'Bhagavad Gita'.

The legend behind Krishna's birth: Mathura (present day Mathura district, Uttar Pradesh) was the capital of the 'Yadavas', to which Krishna's parents Vasudev and Devaki belonged. King Kansa (Devaki's brother) had ascended the throne by imprisoning his father. Afraid of the prophecy that predicted his death at the hands of Devaki's eight son; Kansa had the couple locked into a prison cell. After Kansa killed the first six children, and Devaki's apparent miscarriage of the seventh, Krishna was born. 
Since Vasudev knew Krishna's life was in danger, he was secretly taken out of the prison cell to be raised by his foster parents -Yasoda and Nanda in Gokul (also in present day Mathura district).

'Gokulashtami' is celebrated all over India and every place has it's own unique way of celebration. Let me share with you how it is celebrated in Maharashtra. 
Popularly known as 'Dahi Handi', this festival is celebrated with enormous zeal and enthusiasm. The 'handi' or clay pot filled with buttermilk is positioned at a convenient height prior to the event. A human pyramid is formed and the topmost person tries to break the 'handi' by hitting it with a blunt object (mostly coconut). When that happens, the buttermilk is spilled over the entire group, symbolizing their achievement through unity. 

Moving on to star of this post. The delicacy prepared at my husband's place on this day is 'Bharli Keli' or Stuffed Bananas. My FIL celebrates his birthday on 'Gokulashtami' and this is his favorite dessert. So it is a birthday tradition to prepare this dish for him. And as it is his 60th birthday this year, I shall be making this dish at my home too, to make us feel a part of the celebration with him. 
Particular type of bananas known as 'Rajali Keli' are used for this recipe. They are found only for a month or so in India. I am not going to find these where I stay, so I use regular bananas and it works quite well.

Wish we were together today. Happy 60th Birthday Pappa! 
This one is only for you.

Level: Medium
Serves: 3 - 4 people (1/2 banana per person)
Source: Nita Pradhan (MIL)


Ingredients:
3 firm bananas (pref. Rajali Keli, I used regular variety)
1/4 tsp ghee
4 tblsp fresh grated coconut (I used frozen)
2 tblsp jaggery, grated
2 pinch cardamom powder
1 pinch nutmeg powder (optional)
1/2 cup coconut milk (I used Maggi coconut powder)

Method:
Step 1 - Let us get our filling ready. Heat 1/4 tsp ghee in a pot. When it melts, add the coconut and jaggery and saute it till the jaggery melts. Turn off heat immediately and transfer the contents into a bowl to cool down. Add the cardamom powder and nutmeg powder when the mixture warms down. Mix well with a spoon. Keep aside.

Step 2 - While the coconut jaggery mixture cools down, let us prep our bananas. Peel off the outer cover and carve out the banana carefully in the middle to make it resemble a boat as shown below. Make sure you handle the bananas as delicately as possible. Even a little bit of pressure could break it. Also, we need a cavity to hold our filling. Do not dig too deep.

Step 3 - Stuff all the bananas with the cooled coconut jaggery mixture from Step 1.


Step 4 - Heat a flat pan on low heat. Carefully place the stuffed bananas one beside the other. Spoon out the leftover filling around the bananas in the pan. Carefully pour in the coconut milk. Do not pour it on the bananas. The filling will fall out. Cover and let it cook for 2 minutes on each side till the banana is cooked through and it turns slightly brown.
 - Carefully flip the bananas. Using 2 spoons to flip each banana works best for me.
If you get hold of 'Rajali Keli', you will have to cook each side for 5 - 10 mins as this variety of bananas are firmer in texture and thus hold shape beautifully for this dish.

Serve hot or cold. It tastes delicious either way!
If only this dish looked as good as it tastes!
The nuts and saffron are only for decoration. They are not usually added in the dessert. 

Tuesday, August 20, 2013

Narali Bhaat for Narali Poornima (Sweet Coconut Rice)

'Narali Poornima' marks the end of the monsoon season in Maharashtra, India. It is celebrated on the full moon day in the month of 'Shravan'.
Fishermen and fishing community (koli) in Maharashtra celebrate 'Narali Poornima' or the Coconut Festival in a jubilant manner. Singing and dancing are the main attractions of this festival. They worship and offer coconuts to the Sea God 'Samudra' and the Rain God 'Varuna'.
This festival marks the beginning of the new fishing season.
A special sweet rice made with coconut - 'Narali Bhaat' is prepared at most homes on this day.

'Rakhi Poornima' or 'Raksha Bandhan' is also celebrated on this day. This festival celebrates the special bond and the sacred relation between brothers and sisters. The word 'Raksha Bandhan' means the bond of protection. On this day sisters tie a sacred thread which comes in many colors and designs, on their brother's wrist and in return the brothers offer gifts, presents and promise to protect them against all harms and troubles. Well...almost all!

At our homes we celebrate this day by exchanging rakhis and indulging in 'Narali Bhaat'. Every Maharashtrian home prepares 'Narali Bhaat' differently. The main difference is the use of sugar v/s jaggery. Personally I prefer jaggery as I love the mild flavor and the beautiful golden color it gives this rice. Also, that is how my Ajji made it.
I have tried my best to simplify my grandmom's recipe. Hope it does invite you to try this dish out and enjoy an almost forgotten Maharashtrian tradition.

Level: Easy
Serves: 5 - 6 people
Source: Mamata Wagh (Mamata mami)


Ingredients:
1 cup rice (uncooked, any variety)
2 cups water, boiling
1.5 cups jaggery, grated
3/4 cups fresh coconut (I used frozen)
1/3 cup ghee
5 - 6 cloves
2 - 3 green cardamoms
1/2 tsp cardamom powder
2 pinches saffron (optional)
1/4 cup milk
2 tblsp cashwenuts, chopped
1 tblsp almonds, chopped
1 tblsp raisins
2 pinches salt

Method:
Step 1 - Wash and soak rice in water for 10 mins. Drain out the rice in a strainer and keep aside.

Step 2 - Warm the milk in the microwave for 20 seconds. Add the saffron strands. Mix lightly and let this rest for at least 20 mins.

Step 3 - In a rice cooker or a regular pressure pan, heat 1 tblsp ghee. When the ghee heats up, add the cloves and green cardamoms. Saute for a few seconds. Add the strained rice and saute well on medium heat for 4 - 5 mins. Add boiling water and pressure cook the rice for 2 whistles or till done. Once cooled, fluff up the rice with a fork, taking care not to break down the grains and leave aside to cool. Do not get rid of the pressure pan here. We are going to cook the rice in it again.

Step 4 - While the rice is cooking, take a flat pan and heat 2 tblsp ghee. Saute the cashewnuts and almonds till they are light brown in color. Drain onto a paper towel. In the same ghee, saute raisins till they plump up and drain them onto a paper towel. Keep the nuts and raisins aside to cool.

Step  5 - In the same pan, add another tblsp ghee, coconut and jaggery. Saute for 2 - 3 mins till the jaggery melts. Pour the mixture onto a plate. Add the cardamom powder and mix well. Let this mixture warm down a little.

Step 6 - Once your rice and coconut jaggery mixture is ready, take a large pot, add the cooked, fluffed rice, the nuts, saffron along with the milk it is soaked in and coconut jaggery mixture. Gently mix everything together.

Step 7 - Grease the rice cooker/pressure pan with ghee so the rice does not stick to it's bottom. Put the rice mixture from Step 6 into the rice cooker. Pour in the remaining ghee on top. Cook covered for 20 mins on low heat. If your pressure pan is too thin or you plan to use a regular pot, keep it over a pan so the rice gets cooked with indirect heat. You do not want it all burnt up at the bottom.

And we are done!
Serve warm.


Tips:
This preparation is not supposed to be too sweet. So if you have a very sweet tooth, do add more jaggery.

You can use any dried fruit of your choice and in any quantity as per your preference. I have used raisins, almonds and cashews as I generally have them on hand at home.

Using saffron is optional, but it does give a great aroma and flavor to this dish. Also the dark golden bits in the rice look very appetizing.

In step 6 after you have mixed everything together, the mixture if tasted, will be very sweet. While you cook the rice, all the sweetness in the jaggery gets soaked up and a mild sweet flavor remains.

If you have leftovers, reheating the rice in your microwave will dry out the dish. So sprinkle a little water on the rice and then heat it up. Other option would be to steam this rice in a pressure pan, but that is too labor intensive if you have too little remaining.

Narali Poornima source: here and here!

Saturday, August 10, 2013

Dinda for NagPanchami

The fifth month in the Hindu calendar is 'Shravan'. It usually starts in late July or in the first half of August. The star 'Shravan' rules the sky during Poornima (full moon) night. 'Shravan' month is considered the holiest month of the year as it comes with innumerable religious festivals and ceremonies. Almost every day of the month is considered auspicious. But the first major festival we celebrate is the 'NagPanchami'.

'NagPanchami' is a Hindu festival dedicated to the worship of snakes and serpent deities. It is observed across India on the fifth day of the moonlit fortnight in the month of 'Shravan'.
Plausible reason behind this festival: It is the monsoon season in India. This is the time when serpents invariably come out of their holes that get filled with rain-water, to seek shelter in gardens and more often before, than now, into houses. As they pose a danger to man, people must have started worshiping snakes on this day.
The most popular legend around this festival: 'NagPanchami' celebrates the victory of Lord Krishna over the mythical Kaliya; a monstrous black python that was killed by Krishna in the Yamuna river.

At our home, we try to celebrate all Hindu festivals like we did in India even if we do not fully understand the reasoning behind it. We hope our family and future generations can also enjoy these festivals like we did when we were little. Getting up to some customs and delicacies which were followed and prepared only on these particular days just make these festivals very special.
In most families, no sharp objects are to be used on NagPanchami. No knives in the kitchen. This keeps the food simple. There isn't any need to understand customs that make our lives simple now is there?
Also a delicacy called 'Dinda' is made on this day. These are steamed wheat flour parcels filled with cardamom perfumed chickpea and jaggery mixture. Served hot with a dollop of homemade ghee gets you right in your ajji's lap.

Here is how we make it...

Level: Easy
Serves: 10 medium parcels
Source: Vijaya Pradhan & Nita Pradhan (Grand MIL & MIL)


Ingredients:
For the filling:
1 cup chana dal,
2.5 cups water
1.25 cup jaggery, grated
3/4 tsp cardamom powder
2 Pinches nutmeg (optional)
Pinch of salt

For the cover:
1 cup wheat flour (atta)
3 tblsp oil
1/8 tsp salt
Water for kneading

Method:
Step 1 - Let us get out filling ready first. Wash the chana dal well. Add 2.5 cups water. Keep aside for 5 - 6 hours.

Step 2 - Pour the chana dal along with its water in a pressure pan and pressure cook it for 4 - 5 whistles or till the chana dal is done.
If you do not have time to soak the chana dal, add 1/4 cup additional water to your pressure pan and pressure cook it for a good 8 - 10 whistles for it to be done. 
The final product by any method should be overcooked soft daal.

Step 3 - Drain out excess water (if any) carefully without wasting the daal and mash the daal till pasty with a vegetable masher. You can also do this with a hand blender or in your food processor.

Step 4 - Transfer the mashed daal in a pot and add the grated jaggery and a pinch of salt. Start heating the pot and keep stirring the mixture well on medium heat. Initially, the mixture will liquify and then start bubbling up and thickening. Once the mixture starts thickening turn off the heat. After 2 mins, add the cardamon powder and nutmeg and stir well. Consistency of the puran does not matter too much in this recipe as we are not going to roll out parcels once filled. This is your puran. Keep aside to cool.

Step 5 - Now let us work on the cover of these parcels. Couldn't be simpler. Place the wheat flour in a bowl. Heat oil till it smokes. Pour the hot oil in your flour. It should sizzle. Mix well with your hand. Knead into a smooth dough with water. The dough should be tougher than your regular chapati dough. More like a dough you would knead for puris. Cover the dough and let it rest for 15 mins.

Step 6 - Assembly. Roll out a small dough ball into a disc. Usually these are 2.5 inch in diameter but you can roll them in the size you prefer. Place a tblsp of puran on the center of your disc. Try to shape it into a rectangle so your parcels get a proper shape. Fold all four sides into a parcel. Take care to cover all of the puran well.


Step 7 - Oil the vessel you plan to place your parcels in, to ensure that they do not stick. Place the vessel in your steamer and steam for 20 - 25 mins till the parcels are glossy and the cover does not look raw.


Serve these hot with a small or a big dollop of ghee.

Tips:
When you cook your puran, make sure you do not thicken it too much. On cooling, the mixture thickens even more. We do not want it too hard.
This is how my MIL taught me to test puran - Once the chana dal - jaggery mixture starts getting a little thick, place a teaspoon - wide side down in the center of the mixture. If it falls quickly, you have to continue cooking. If it falls really slowly, your puran is ready. That being said, you really need not over analyse the consistency for this recipe as it just gets steamed.

Dinda hardens a little over time. So make a small batch to avoid leftovers. But if you do have leftovers, do not heat them in a microwave. Steam the dinda for 5 - 6 mins in your steamer.

I use 1.25 cups of jaggery to 1 cup of chana dal, as the jaggery that I buy in the US, is not too sweet. Originally, 1 cup of jaggery to 1 cup of chana dal is used.

I have not elaborately explained the dough kneading process. That is for another post. So if you are new to that, do browse the net for puri recipes to understand the dough consistency.

Make sure you roll out the dough into thin discs as a thick piece of steamed dough is not too pleasant.
For people who do not like these parcels steamed, you can always fry the parcels
in oil.

Resources on NagPanchami: Here and here!

Wednesday, May 22, 2013

Oatmeal Cookies

If you are one who stares at the jar of oatmeal, wondering how to make yourself like it, you are in for a treat. This is by far the most convenient and tasty way of introducing oats in your diet.
These cookies are crisp and soft and nutty and crunchy all at the same time. A flavor explosion in your mouth! The huge amount of oats in each cookie, makes it a great grab and go breakfast or snack bar. Perfect for those busy mornings or when you are stuck in traffic with a growling tummy dying to get home to food!

You can load these cookies with your favorite ingredients. If you plan to eat these for breakfast or as a healthy snack, add your favorite nuts and dry fruits. If you plan to replace your dessert cravings with these, throw in some chocolate chips along with the nuts...just let your imagination go wild!

An important detail to remember - You need to use Old Fashioned Oats/ Rolled Oats for this recipe and not the instant variety. Although they are quite interchangeable, you will need the thickness of the rolled oats to get the perfect texture in this recipe.

Getting back to the recipe...

Serves: 24 medium-large size cookies
Level: Easy
Source: JoyOfBaking


Ingredients:
3 cups old fashioned oats
3/4 cup plain flour
1/2 tsp baking soda
1/2 tsp salt
1/2 tsp ground cinnamon
3/4 cup unsalted butter, at room temperature
1 cup packed light brown sugar
1 large egg
1 tsp vanilla extract
1 cup nuts (I used pecans)
1/2 cup dry fruit (I used raisins)
1/2 cup chocolate chips (I used bittersweet and white mixed together)

Method:
Step 1 - Preheat oven to 350 deg F (177 deg C). Line two baking sheets with parchment paper.

Step 2 - Mix together the plain flour, baking soda, salt and ground cinnamon until they are well combined. Keep aside.

Step 3 - In a bowl, whisk together the butter and sugar until creamy and smooth. Add the egg and vanilla extract and beat well to combine.

Step 4 - Combine the flour mixture from Step 2 into the butter mixture from Step 3. Beat well till combined.

Step 5 - Stir in the nuts, oats, dry fruits and chocolate chips. Use a wooden spoon or spatula to combine all the ingredients well.

Step 6 - With a large spoon, plop fairly large blobs of batter (1/4 cup each) onto your lined baking sheet. Space the cookies about 2 inches from each other, giving them room to expand while baking. Then wet your fingers with water and roughly shape the cookies into rounds that are 1/2 an inch thick. Bake for 18 - 20 mins or until golden around the edges. Once done, transfer them to a cooling rack and let them cool completely, before transferring them to an air tight container.

Sit back with a glass of milk or some coffee and indulge!
Perfect!


Tips:
We need 2 cups of your favorite addition in this recipe. You can use all nuts or all raisins or all chocolate chips or any other ingredient for that matter. Just make your favorite combinations to enjoy these cookies.

You can use salted butter for this recipe. Just skip the additional salt.

Baking time could vary depending on the oven sizes. So do keep an eye on these.

The original recipe calls for baking for 12 - 15 mins. But I prefer my cookie bottoms a little brown and crisp. Hence the 18 - 20 min baking time.


Tuesday, December 18, 2012

Tres Leches Cake

'Tres leches cake' or 'Three milk cake' is a cake soaked in three kinds of milk - Evaporated milk, Condensed milk and Whole milk. This moist cake is so easy yet so impressive! Perfect for big crowds and almost always a stunner! 

When I first started hunting for recipes of this cake, I was worried the final product would be too heavy or too sweet. I was also a little apprehensive as it sounded too easy to be true. But when I finally did decide to give it a go, I was in love all over again! :) It was perfectly moist, perfectly sweet just .....PERFECTLY PERFECT!

Most of the desserts I cook for my parties at home are almost always just semi-homemade. I do not have the time or energy to go all traditional and super precise after I spend so much time cooking the main meal. This recipe too starts with a box cake mix. I generally use the classic white cake mix for this recipe. I find it much more airy and light compared to the other cake mixes. 

For the topping, I whip the cream at home as I the try to keep the sugar content in it quite low. This way it perfectly balances the sweetness in the cake. But if you think you don't have time for that, some cool whip or ready made whipped cream spray cans work just fine. 
Most of the tres leches cakes are topped with a maraschino cherry. They look the cutest, but I just do not like the taste. It spoils the dessert for me as you expect it to be sweet and it turns out to be weirdly synthetic. So I generally top my cake with some freshly cut strawberries or blueberries or raspberries just before serving. You could also toast some nuts or some coconut and sprinkle it on top of the cake. Just let yourself go crazy with the toppings here.

So without further delay, let us get to the recipe.

Level: Easy
Serves: 10 - 12 people

Ingredients:
For the base:
1 classic white box cake mix
1/4 cup of whole milk (I use the 2% I usually have on hand)
1 14 oz can of condensed milk
1 12 oz can of evaporated milk
For the frosting:
1.5 cups whipping cream
4 tblsp powdered sugar
1 tsp vanilla essence
Cocoa for sprinkling
Strawberries to decorate

Method:
Step 1 - Bake the cake as per the package instructions. Bake it in the same pan in which you plan to serve the dessert. Your pan should have higher sides as you will have to pour the milk mixture into the cake once it bakes and you do not want the milk to over flow from the top. Once your cake is baked, leave it for cool for 5 mins.

Step 2 - As the cake is cooling, let us get our milk mixture ready. Mix the milk, condensed milk and evaporated milk in a bowl. Stir well to make sure the condensed milk does not settle at the bottom. It is that simple. Keep aside.

Step 3 - After you have let the cake cool for 5 mins from Step 1, take a knife or fork and slowly poke the entire cake well all the way to the bottom. You might think you are destroying the cake, but remember the places this cake does not get poked, does not get the liquid goodness we will be pouring into it. So don't be too gentle!

Step 4 - When you are done piercing holes and the cake is still warm, pour the milk mixture all over the cake. (don't forget to stir the milk a little before you start pouring). At this point you will realize why I was stressing on a pan with a little high sides. The liquid will first pool on top and you might think it is a little too much. But the warm cake will soak up all the liquid in a matter of mins. Now let the soaked cake cool down completely. 

Step 5 - Let us work on the frosting now. In a large clean bowl add the whipping cream and vanilla essence. Start whisking this cream mixture. When the cream starts frothing, slowly add the powdered sugar one tsp at a time, continuously whisking. Beat the cream till it forms stiff peaks. i.e. when you take the beaters out, the cream stuck on your beater should hold shape. These are called stiff peaks.

Step 6 - Smear the ready whipped cream with a butter knife or a spatula all over the cooled soaked cake from Step 4. Try to spread it around as evenly as possible covering the entire top of your cake. 

We are done!

Just before serving, I cut out a piece and placed it on my serving plate. I sprinkled the top with some cocoa powder and I placed a beautiful red strawberry beside it. Doesn't it look pretty? I sure think it does!


Hope you enjoy this juicy goodness as much as my family and friends do!

Tips:
If you are having a tough time finding the classic white box cake mix, go ahead and use the yellow cake mix. The cake may be a a little denser, but it doesn't compromise the taste.

If you think you are not up for whipping the cream yourself, go ahead and use some cool whip or whipped cream spray can to top off the cake.

Saturday, November 10, 2012

Rava Besan Ladoo

Ladoos (Sweet Indian Rounds) are an integral part of Diwali celebrations at Indian homes. Though Indian cuisine boasts of making ladoos out of a variety of ingredients, Diwali celebrations mostly involve Besan Ladoos (chickpea flour ladoos), Rava Ladoos (semolina ladoos) or a combination of both these ingredients Rava Besan Ladoos (chickpea flour and semolina ladoos).

My personal favorite ladoos are Rava Besan Ladoos. I think they just have the perfect texture which takes me to 'Ladoo heaven'! Not too soft like Besan Ladoos and not too gritty like Rava Ladoos. Now that does not mean I am not a fan of the other ladoos. I just have a soft corner for these cuties. 

Everyone at our home likes simple ladoos. No fancy nuts or raisins in them. Maybe because that is how we remember eating them as kids when our ajjis made them. But you are free to add cashewnuts, almonds and raisins to this recipe. Just remember to toast the nuts well before adding them.

Now let us get to making these ladoos.

Serves: 20 medium ladoos
Level: Medium 


Ingredients:
2 cups semolina/rava (fine)
1 cup chickpea flour/besan
6 tblsp ghee
2 cups + 2 tblsp sugar
1 cup water
3/4 tsp cardamom powder
2 pinch saffron strands
pinch of salt

Method:
Step 1 - In a heavy bottom pan, roast the semolina well on medium heat stirring continuously. Roast till it smells awesome and turns brownish. Keep aside to cool.

Step 2 - In the same pan, heat the ghee and roast the chickpea flour on medium heat till it turns golden brown in color. This mixture will not be dry like the semolina. It will form a paste. Take the pan off heat. Add the roasted semolina from Step 1 and mix well. Keep aside till we work with our sugar syrup.

Step 3 - In another pot, add the sugar and water. Start boiling on medium heat. Initially the syrup will foam up a lot. Keep boiling it for 5 mins. Till then you should see clear liquid bubbling. After 5 mins of rapid boiling, start testing the syrup. Dip a steel spoon into the syrup and stir it around well. Take out the spoon and swipe your index finger on the back of your spoon to test the syrup. Now touch your thumb to your index finger and gently pull the two fingers a little apart. A single thread should form in between these fingers. Keep joining and releasing these 2 fingers a couple of times rapidly. If you see a single thread form each time, you are done. Usually this should be achieved in 2 to 3 mins from your first boil.

Step 4 - Pour this sugar syrup into the dry mixture from Step 2. Mix well with a spoon. Make sure there are no lumps. Cover it and let this mixture rest till it cools down, absorbs all the syrup and thickens enough to form a ball. 

If you make this on a warm day, the mixture could take 4 to 5 hours to cool down and thicken up. On the other hand, if you make this on a cold day it could take just 30 mins. So do keep an eye on it. Once you realize that you are able to press the mixture together, you are good to go.

Step 5 - When the mixture is still a little warm, add a pinch of salt, the cardamom powder and the saffron strands. Mix well. Let the mixture cool completely.

Step 6 - Take a heaped tblsp of mixture into your hand and just press it together till it holds shape. Once you have the mixture clumped up well, roll them in the center of both your palms till it forms a smooth ball. Do not apply pressure while rolling as this might break the ladoos. Also, when you start rolling you might realize that the mixture is not looking as smooth as a ladoo. Do not worry. Keep rolling it into a round shape with minimum pressure. The heat in your palms will mold it into a smooth ball. 
If you are uncomfortable while rolling the mixture as it sticks a lot to your hand, you can apply some ghee on your palms before you start rolling.

We are done! Enjoy these any time of the day!

Hope you enjoy these ladoos as much as we do.

Tips:
Even though it is true that the sugar syrup consistency is key to making ladoos, do not let that scare you. Try to get the one string consistency as correct as you can. This does take time. 
Just remember that if you under cook the syrup, all that will happen is your ladoos will be soft and will not hold shape. They are not going to taste bad.  And if you notice that you have boiled the sugar a little too long and now see 2 strings instead of 1 between your thumb and index finger, you have gone a little too far and you might not be able to roll out the ladoos well. When this happens, just put the ready warm mixture into a greased plate, cut them into squares or diamonds before they completely cool off and make Rava Besan Wadi (Bars) instead of round ladoos. 

The sugar testing process has to be done by testing the syrup when it is hot. When you touch your steel spoon to test the syrup, do not try to take a lot of it on your finger. Do understand that it is boiling sugar that you are handling. Also, just a tiny amount is necessary to test the consistency. When I was new to making ladoos (I am fairly new even now), I was paranoid about touching the syrup. So I always kept a bowl of cold water right next to me in case I burn myself. It is only after a few tries that you realize that such small quantities don't really burn you.

If you want to add nuts to this recipe, toast them well and add them at step 2 when you mix the roasted semolina and chickpea flour.
If you want to add raisins, add them when you start molding the ladoos in Step 6. You need not fry or roast these.

Tuesday, August 21, 2012

Chocolate Chocolate Chip Muffins! (Eggless)

A lot of my blogger friends were trying out Nigella's Double Chocolate Chip muffins and I could no longer resist! They looked so easy and tempting. And noticing those sly chocolate chips staring at me every time I opened the freezer, I caved and got to it! 

I have altered the recipe a little to suit my family's tastes and also based on some viewer comments. I have also substituted the egg for flax seeds which made me feel a little healthy while I indulged. Thank god for little pleasures..:)

These muffins are a little more than just a breakfast muffin. They are a chocolate muffin studded with chocolate chips! Things may not get any better. 
You can play around with this recipe. Add any variety of chocolate chips you like. Add some walnuts or pecans for a little crunch.
The sugar quantity I have used makes fairly sweet muffins. I prefer the sweetness the milk chocolate chips give these muffins rather than sugar. But if you plan to use semi-sweet or dark chocolate chips, do add in a an extra 1/4 cup of granulated sugar.

Now let us head towards heaven!

Serves: Makes 12 - 13 muffins
Level: Easy
Adapted From: Nigella Lawson's Recipe


Ingredients:
1.75 cups all purpose flour/plain flour
2 tsp baking powder
0.5 tsp baking soda
4 tblsp cocoa powder
1 cup granulated sugar
3/4 cup chocolate chips (I used milk chocolate)
Pinch of salt
1 cup milk (I used 2%)
1/3 cup + 2 tblsp vegetable oil
(1 tblsp flax seeds + 4 tblsp water) / 1 egg
1 tsp vanilla extract
1/4 cup chocolate chips to sprinkle on top

Method:

Step 1 - Preheat oven to 350 deg F. Line a muffin pan with liners and lightly spray these with some cooking oil. 

Step 2 - Let us get the egg substitute ready. Grind 1 tblsp flax seeds. Add these to 4 tblsp water. Stir well. Keep aside for a couple of minutes. 

Step 3 - Take a medium sized bowl. Add the all purpose flour, baking powder, baking soda, cocoa powder, granulated sugar and a pinch of salt. Mix well with a spoon. Add the 3/4 cup of chocolate chips. Stir well again till all the chocolate chips are coated with the flour and cocoa mixture. Keep aside.

Step 4 - Take a large bowl. Add the milk, vegetable oil, egg substitute from Step 2 and vanilla extract. With a wire whisk, mix all the ingredients well for a minute.

Step 5 - Slowly start adding the dry ingredients from Step 3 into the large bowl of our wet ingredients. Lightly mix together. Do not over mix. Remember that a lumpy batter makes the best muffin.

Step 6 - Pour the batter with a spoon into the muffin cups. Fill only till it is 3/4th full. Randomly sprinkle the 1/4 cup of chocolate chips on top of the batter. Bake these muffins in the preheated oven for 18 - 20 mins. They are done when a toothpick inserted in the center comes out batter free.

Serve warm for breakfast or as dessert with some vanilla ice cream.


Tips:
Remember that while testing your muffins for doneness in the end, your toothpick could have some liquid chocolate stuck to it. Do not worry about this. This is just hot melted chocolate chips. You just have to make sure there is no wet batter sticking to the toothpick.
Chocolate muffins are easily burnt as the color makes it difficult to know if your muffins are burning. So keep an eye on your timer.

If you want to use the egg and not the egg substitute, add it into the wet ingredients in Step 4.


Tuesday, May 15, 2012

Ambyacha Cake (Mango Cake/Burfi) - Eggless

A perfect blend of Rava Cake and Chitale's Amba Burfi!

This recipe is easy and effortless. I found this gem while I was hunting for some quick mango recipes. I was in the mood to try a dish I had never tried before. This cute looking cake was immediately bookmarked by me mainly because it felt a little too simple to be true. End result - Absolutely Fantastic!
Only thing you need to remember is not to bake this cake till it browns. That would ruin the sunny yellow looks of this cake. You can also cut this cake into diamond shapes or squares and serve it as a burfi on special occasions.

Now to the recipe..

Serves: 4 to 6 people
Level: Easy
Source: RedChillies


Ingredients:
1 cup semolina (fine variety)
1 cup mango pulp (I used sweetened canned Alphonso mango pulp)
1/2 cup unsalted butter, melted
1/2 cup sugar
1 tsp baking powder
1/2 tsp cardamom powder

Method: 

Step 1 - Preheat oven to 375 deg. F.

Step 2 - In a large bowl mix all ingredients with a wooden spoon or spatula till they are well combined. No need to over mix.

Step 3 - Pour the batter into a greased baking pan and bake for 25 to 30 mins till a toothpick entered into the center of the cake, does not have any raw batter stuck to it. Keep an eye on the cake after 20 mins as you do not want it to brown on top.

Serve warm or at room temperature.
You can store this cake in the refrigerator for a week. Whenever you are ready to indulge, just microwave it for 30 seconds and it will be warm and soft again.

Enjoy!


Rack Your Brains!
Alphonso mango is considered one of the best in terms of sweetness, richness and flavor. It is one of the most expensive kinds of mango and is grown mainly in the Konkan region of Western India.
The Alphonso Mango is named after Afonso de Albuquerque. This was an exquisite and expensive variety of mango, that he used to bring on his journeys to Goa. The locals took to calling it Aphoos in Konkani and in Maharashtra the pronunciation got further transformed to Hapoos. This variety then was taken to the Konkan region of Maharashtra, South Gujarat and other parts of India.
Read more here!

Thursday, April 5, 2012

Baklava Muffins

Baklava though tempting, is not something I see myself make in the near future with weight management forever on my agenda!
I did notice that inspite of it's exotic looks, Baklava is really simple to make.
The only thing I know is that we don't need a tray of this decadent dessert sitting in our refrigerator seductively staring down at us all the time. And knowing us, we will cave almost everytime!
So I dug and dug for Baklava siblings to enjoy this dessert on those special occasions or when my dinner themes were Mediterranean or just for brunch.
To tell you the truth, you don't really need a special occassion to make these muffins of joy! They are simple, quick and awesome!

These muffins have a light muffin texture and a nutty top or inside. They have a characteristic walnut and honey flavor with a hint of cinnamon in the background. By themselves, they are not as sweet, but if you eat them the way you are supposed to - with some warm honey, it tastes perfect! I will definitely try these again really soon.

Now, you can add the walnut-cinnamon filling in the middle or on top of the muffins. I personally sprinkled it a little in between the batter while assembling and a lot on top, as I loved how roasted and caramel like the topping got when these were all baked. And the aroma that spread in the kitchen while these were baking...was pure bliss!

Let us get to the baking now..

Level: Simple
Serves: 12 muffins
Source: Nigella Lawson's 'How to be a Domestic Goddess'


(honey soaked muffins)

Ingredients:
For the filling:
1/2 cups chopped walnuts
1/3 cup sugar
1.5 tsp cinnamon powder
3 tblsp butter (melted)

For the muffins:
1 cup + 7 tblsp plain flour (yes..that is how she measures it)
2 tsp baking powder
0.5 tsp baking soda
1/4 cup sugar
1 large egg
3 tblsp butter (melted)
1 cup + 2 tblsp buttermilk

For the topping:
1/2 cup honey (I used 1/8th cup. That was all the sweetness we needed)

Method:
Step 1 - Preheat oven to 400 Deg F. Place your muffin liners in your muffin pan and spray them lightly with some nonstick spray.

Step 2 - Let us make the filling. In a bowl, add all the filling ingredients together (chopped walnuts, sugar, cinnamon powder and butter). Mix well. Keep aside.

Step 3 - In a large bowl, take the plain flour, baking powder and baking soda together. Mix it well with a spoon. Make a well in the center to pour in the liquid ingredients. Keep aside.

Step 4 - In another medium bowl, whisk together the egg, melted butter and buttermilk. Whisk it till it all incorporates together and forms a creamy, liquidy mixture.

Step 5 - Pour this mixture into the well formed in the dry ingredients in Step 3. Mix lightly and gently with a spatula or a spoon remembering to keep it bumpy rather than smooth. Do not get your electrical appliances out for this. I cannot stress enough on how gentle you need to be here. Too much handling of the batter will result in heavy muffins.

Step 6 - Now let us get assembling. Fill in each muffin cup 1/3rd full with the batter. If your batter is too thick, spread it around so that it covers the base of the muffin cups completely. Sprinkle a little filling mixture from Step 2. Cover this with the remaining muffin batter till the muffin cups are 3/4th full. Do not overfill the muffin cups. Sprinkle the remaining filling on top of the muffin batter. Lick those cinnamonny fingers! ummmm...

Step 7 - Bake these in your preheated oven for 15 mins, by which time they should be golden-brown and ready. A toothpick inserted in the center should come out without any liquid batter on it.

Step 8 - Take the honey in a microwave safe bowl and heat for 10 - 15 seconds. Stir the honey well. This should make the honey runny (that just rhymed!).

Serve warm with some warm honey over it. The warmth in the muffins, soaks in all the sweetness from the honey! DIVINE!


Tips:
If I want to enjoy these at a later time I let the muffins cool down, put them in a box and store them in the refrigerator. When it is time to eat, I just pop them in the microwave for 30 seconds and serve. I keep the bowl of warm honey on the table, so people can adjust the sweetness of these muffins as per their own desired sweetness levels.

Walnuts:
By now, you have likely heard that a diet rich in certain types of fish helps ward off heart attacks and strokes. But if you can't stand the thought of eating fish - try WALNUTS instead!
A new study suggests that walnuts have a similar beneficial effect on cholesterol levels and C-reactive protein (CRP), an inflammation marker that is strongly associated with atherosclerosis and heart diseases.
A recommended serving of walnuts is 1 ounce, which equates to 1/4 cup or 12 - 14 walnut halves.

Tuesday, March 27, 2012

Kurmuryache Ladoo (Puffed rice balls)

A super quick and simple snack, which gets me back to my childhood vacation time, which I usually spent with my cousins and ajji. She used to make the best kurmuryache ladoo I have ever tasted ! I used to sit in the kitchen with her, when she made these ladoos and always made sure at least a couple went right from the plate into my mouth. ohhhh...I miss her so much.

Though these ladoos are quick and easy to make, the kurmura/murmura/puffed rice that I manage to get hold of in the USA are as chewy as they get. Tried many brands and types of puffed rice, but they all were chewy. Now, when you make chivda, you dont have to worry too much about the puffed rice being chewy. You roast them in the preparation, which gets them crunchy again. But while making sweets, chewy puffed rice added to jaggery is going to result into a chewy ladoo. But there is a way around this. Isn't there always...
So here is a recipe, which will first get your puffed rice crunchy and then helps you make lovely ladoos which will stay cruchy for a couple of days. That is if they last that long...

Another thing, which I need to stress here is that, like all sweet preparations, you need to have all ingredients ready and then start making the ladoos. Once, jaggery is added to the kurmura, it turns hard really quickly. If you lose time here, it will be difficult to mold it into a circle. And don't worry too much about the temperature here. Trust me,once you add puffed rice, the temperature drops really quickly and unlike Til ladoo or rava ladoo these ladoos can totally be handled. But if this still scares you, go right down to the Tips section and see what else can be done.

So let us get cooking some kurmura ladoo. Ajji this one is for you!

Level: Medium
Serves: 12 - 14 medium sized ladoos


Ingredients:
4 cups heaped puffed rice/kurmura
1 cup jaggery, grated (any kind)
1 cup water
1/4 tsp cardamom powder
1 pinch nutmeg powder (optional)
1 bowl of water (for syrup testing and molding)

Method:
Step 1 - Let us get the puffed rice crunchy. Place a paper towel onto a microwave safe plate, spread the puffed rice in a single layer and microwave for 40 to 45 seconds. Remove and place the warm kurmura in a pot. Do not panic! They will be crunchy only when they cool down. You will have to do this in batches, without over crowding the plate till all 4 cups of kurmura are done. If you think the kurmura is getting brown at the edges, reduce your microwave cooking time by a couple of seconds.

Step 2 - In a wide bottomed pan, heat the jaggery and water together on medium heat. Initially, it will start melting and then gradually it will start foaming as shown in the picture below. Once the jaggery foams up completely for 2 to 4 minutes and gets a caramel-like color, start testing the syrup. Drop a tiny drop of the syrup into the bowl of water. It should hold it's shape and should not dissolve in water. Put your hand in the bowl and try and form a soft ball (underwater) out of this jaggery with your thumb and index finger. When you can do that, the syrup is ready. This syrup making process should take you only about 15 mins from start to finish.


(Clockwise - Syrup making, from a slow boil to a fast boil to a caramel colored boil)

Step 3 - Add the cooled kurmura, cardamom powder and nutmeg powder if using into the syrup and mix well till the jaggery is well coated. The kurmura will soak in all the syrup and this mixture will just look like a thick golden mass.

Step 4 - Let this cool only till it can be handled, which will not be more than 2 mins out. Start shaping into balls. Press them lightly into shape. If the mixture is sticky or warmer than what you can handle, just dip your hand in some cold water and continue shaping them.

Done!


Hope you enjoy them as much as I do!

Tips:
If you think making round balls is not upto you, just press the puffed rice mixture into a greased baking tray or on a plate. Run a knife through it, while it is warm to get your desired shape. Do not break them apart until they cool down. This way the entire 'handling warm puffed rice with your bare hands' process is avoided.

Generally there are 2 varieties of puffed rice you use in Indian snacks. One is the regular long variety you use for bhel and another is the round smaller variety (Kolhapuri kurmura) you use for ladoos or bhadang. Ideally Kolhapuri puffed rice is used for these ladoos but you can use any kind that you have on hand. It really doesn't matter.

Generally people add peanuts, dry coconut or roasted chana dal to these ladoos. But I remember eating these plain and that is how I make them. Please feel free to add your favorite ingredients in Step 3 along with the kurmura. Don't forget to roast or fry these ingredients before adding them.

Submitting this recipe to CookEatDelicious for her 'Picnic Dessert' event.

Tuesday, January 24, 2012

Espresso Brownie (Box Mix recipe)

Basic Brownies...DONE!
What next?

Let us combine our favorite things..Chocolate and Coffee..
Now why won't these just ROCK!

I first saw this recipe on Food Network. Instantly impressed! Who would'nt be? But the icing bit scared me. If you are a follower of my blog, you will realise, that icing and me don't go hand in hand. I don't particularly enjoy iced desserts. I find them too sweet! Well that's just me!
But the way this recipe was shown, made it sound really simple and interesting. It started with a BOX MIX and a really super thin layer of icing.
Nothing else gets me started faster than a box-mix recipe. So many steps out of the way. Why wouldn't anyone make this?? So I got going..
End result? Bliss!

Espresso Brownies are a sure shot crowd pleaser! They are fudgy, chocolatey and oh so yummy!
The coffee in the recipe is not overpowering. It doesn't make your brownie taste like coffee! Just makes the chocolate more intense. And that can never be a bad thing! EVER!
The icing on the brownie is very sweet. But as we just apply a thin layer, it doesn't make this dessert too sweet! It just makes it even more perfect, if that is even possible..

I will end with a small note. Please do not replace espresso powder with instant coffee powder. Unfortunately, instant coffee in these amounts, make the brownies and the icing bitter. So make a trip to your grocers and get a small bottle of espresso powder. Trust me, it will be well worth it!

And as I believe in "All good things, need to be shared!"...here are Espresso Brownies for you!

Level: Easy
Serves: 10 - 12 people
Source: Food Network (Giada at Home - Giada De Laurentiis)


Ingredients:
For the base:
1 pack Brownie Mix (any brand)
Eggs, as per box instructions
Oil, as per box instructions
Water, as per box instructions
2.5 tblsp espresso powder
1 cup chocolate chips (any kind. I used semi-sweet)

For the glaze:
0.75 cups powdered sugar
2 tsp espresso powder
2 tblsp water
1 tblsp unsalted butter (at room temperature)
1 tsp vanilla extract


Method:
Step 1 - Preheat oven to 350 Deg. F. Line your baking tray (I used 9 X 13 baking tray) with parchment paper and spray some oil over it.

Step 2 - Prepare the brownies as per the package instructions. Do not over mix. Stir in the chocolate chips and the espresso powder.

Step 3 - Pour the batter into the prepared pan. If the mixture is thick, spread it around the pan with a spoon or a spatula. You do not have to take much efforts to even the batter out. Just make sure it does not all clump up only in the center of the pan. The baking process will spread and even out the batter.

Step 4 - Bake in the preheated oven for 20-25 mins. The best way to know if your brownies are done is when a toothpick entered in the center of the cake comes out with some fudgy crumbs for fudge brownies and clean for normal brownies. It should  not show wet ingredients on it. Other ways of knowing if your brownies are done, is when they have little cracks on the surface and they are no longer shiny, but have a matt finish to them.

Step 5 - Let the brownies cool down completely for about 30-35 mins.

Step 6 - Meanwhile let us get to the glaze. In a small bowl, add the powdered sugar, espresso powder, water, unsalted butter and vanilla extract. Whisk it together till it forms a smooth lump free paste-like batter.

Step 7 - Pour the glaze on the cooled baked brownies. Spread it around with a spoon or a spatula. You want a thin layer over the brownies.

Step 8 - Let the glaze set for 10-15 mins. Cut into pieces.

You can serve these with some vanilla ice cream or just as is!


Tips:
I used a 9 X 13 pan. As you can see, that gives us thinner brownies. That is what we prefer. As the glaze is very sweet and strong, a thin layer is perfect for us. If you want thicker and stronger brownies, use a smaller pan. Just make sure you increase the baking time a little.

I always line my baking pan with aluminum foil before placing in the parchment paper for brownies. This is not really necessary, but I like to be safe than sorry.

I used a 19.8 oz brownie mix pack. But any brand between 18 oz to 20 oz will do.
I used the Fudge Brownies package. You can use normal plain brownies too, if fudgy is not your thing.

You cannot substitute the powdered sugar with granulated sugar. The icing would be too runny and will not set properly.

Do not be impatient and pour the icing over warm brownies. Instead of a glaze, you will have coffee icing soaked brownies. Not pretty!

You can refrigerate these brownies for a week and freeze them for a month. Just make sure you get them to room temperature before you serve them.

Saturday, January 14, 2012

Til Gul for Makar Sankranti!

"Makar Sankranti" is the first auspicious occasion at the beginning of the year.
It is on this day that the sun starts it's northward journey (Uttarayan) and enters the zodiac 'Makar' aka 'Capricorn'.
'Sankranti' means 'transmigration'. Represents the transition of the sun from one sign to another. Now, there are 12 transitions in a year, as there are 12 zodiac signs! But it is particularly auspicious in the month of January (Magh) as it marks the harvest season and also the end of winter. From this day onwards, the days start becoming longer in the northern hemisphere.

Most of the Indian festivals are celebrated based on the lunar calender. But 'Makar Sankranti' is celebrated based on the solar calender. Hence the date for celebrating Sankranti is always Jan 14th.
Then why wasnt it this year? This year Sankranti falls on Jan 15th!!
Lord Wiki explains....
Scientifically, the shortest day of the year is around Dec 21-22 after which the days begin to get longer. Hence actual Uttarayan is Dec 21. This was the actual date of Makar Sankranti too. But because of the Earth's tilt of 23.45 degrees and sliding of equinoxes, has caused Makar Sankranti to slide further over the ages. 1,000 years ago, Makar Sankranti was on Dec 31 and now on Jan 15. 5,000 years later, it shall be by the end of February, while in 9,000 years it shall come in June.. Interesting!!

This festival is celebrated differently across India. Let me tell you how people from Maharashtra enjoy this festival...
Maharashtrians celebrate it by worshiping the sun and distributing Til Gul laadus. People visit their friends and relatives and exchange Til Gul laadus and say "Til Gul Ghya ani Goad Goad Bola", which literally means "Have til gul and speak sweet words". It is a day where we forget all our indifference and start our relationships afresh with a whole lot of love.
 - Newly-wed brides are dressed up in black saarees gifted to them by their in-laws. They are accessorized with jewellery made out of sugar candy which is to be created by her sister-in-laws. Haldi-Kumkum is organised where close friends and family are invited.
 - Babies who celebrate their first Sankranti celebrate "Bor-Nahaan". Lots of other tiny kids are invited to this function. Assorted goodies consisting of bor (a fruit), sugar candies, chocolates etc. are slowly poured over the toddler's head and all the other kids rush to pick up all that they can!

The food prepared is closely linked with the climate at this time of the year, like it is during most of the Indian festivals. Til (sesame seeds) and Gul (jaggery) used in sweets on this day has properties in them that keep our body warm.
Sweets like Til Gul laadu, Til Gul Vadya, Gul Polis etc. are some of the traditional sweets prepared on this day.

Enough said...? Maybe not!
Now, let us get to making some crispy and crunchy Til Gul Laadus shall we?


Level: Medium (heat involved)
Serves: Makes coin sized 16 Laadus


Ingredients:
1 cup white sesame seeds
1/4 cup broken roasted peanuts
3/4 cup grated jaggery (any kind - a blessing!)*
1 tblsp milk (If you do not want the til gul laadus very hard)
1 tblsp clarified butter/ghee + some more
1/2 tsp cardamom powder
1/4 tsp nutmeg powder
A mini-muffin pan
A small bowl of cold water (for syrup testing)

Method:
Step 1 - In a pan, dry roast the sesame seeds on a low flame. Stir continuously. Do not leave it alone even for a bit. They burn very quickly. When the seeds turn light brown, slide them onto a flat plate and let them cool down completely.

Step 2 - Grease the mini-muffin pans with clarified butter/ghee. (Liberally if you dont have a non-stick variety mini-muffin pan). Grease another glass plate similarly for pouring the final mixture at Step 6.

Step 3 - In the same pan, heat the clarified butter/ghee on low flame. Add the grated jaggery and keep stirring it rigorously till it all melts and starts forming a smooth paste. When it starts bubbling, every 1 min drop a tiny drop of jaggery in the cold water and try to form a ball with your thumb and index finger. It should not dissolve in the water. Once it forms a small soft ball inside the water, the syrup is ready. This should not take you more than 3 to 4 mins into the heating process. So be alert.

Step 4 - Pour in the roasted sesame seeds and peanuts into the melted jaggery. Mix it well. Confirm the heat is still on low. The mixture will start turning runny again. Don't forget to keep stirring.

Step 5 - Immediately pour in the milk, cardamom powder and nutmeg powder. Mix well again for a minute. We are done!

Step 6 - Pour this mixture onto a greased plate to help it cool and to stop it from cooking further. Start scooping the mixture into the greased mini-muffin moulds. Make sure you keep pressing the mixture down so you get a good solid shape. You don't want empty pockets in between. Leave them to cool for 30 mins.

Pop these out onto a plate or into your mouth. Perfect!


Tips:
* Generally, "chikkicha gul" - a sticky variety of jaggery is used to make this preparation. I failed to find any in the Indian stores around my home. This is the reason I put the mixture into moulds as it is difficult to roll out the mixture into rounds with regular jaggery. Plus I don't like handling very hot jaggery. Did it once, not pretty!

You can also plate the hot mixture onto a greased plate and shape it into an even flat layer. Then, when it cools down a little, but is still warm, you can cut it into squares or diamonds or any other shapes. Do not pull them apart just yet. Let them cool completely and then break them apart.

1 tablespoon of milk does not make these laadus chewy! Just crunchy enough to eat a lot at one time...without breaking a tooth!

And last but not the least... use a mini-muffin pan and NOT a normal muffin pan!

HAPPY MAKAR SANKRANTI EVERYONE!
Til Gul Ghya ani Goad Goad Bola!


Saturday, October 1, 2011

Brownies Simplified!

If you are looking for that special, no fuss, complication-free brownie recipe... Look no further!
Here is one simple 'Basic Brownie' recipe for you.

Before we get into brownie variation recipes, it is nice to have a trusted basic recipe on hand.

This recipe is tried and tested, quick and has nothing overly fancy in it, to scare you away from baking these.

Great eaten by itself, these brownies taste better warm, with a dollop of vanilla ice cream or even with just a warm glass of milk.
Sizzling brownies are just a sizzler plate away when you have this easy-breezy brownie recipe.

This recipe makes a brownie which is denser than a cake, yet not too fudgy! Thats how I like it!
You can add a cup of walnuts or pecans in this batter for a nice crunch.

The coffee in the ingredients is optional and is used only to enhance the chocolate flavor. This quantity does not make it a coffee flavored brownie.

This recipe is dedicated to my sister-in-law who is a die hard fan of these beauties! Its her 'to-go' recipe whenever we have guests over.
And it has NEVER failed to impress!

So lets get baking...

Level: Easy
Serves: 6 to 8 people


Ingredients:
200 gms melted butter
1/2 cup unsweetened cocoa
1.25 cups granulated sugar
3 eggs
2 tsp vanilla extract
3/4 tsp instant coffee powder (optional)
1/2 cup plain flour
Pinch of salt

Method:
Step 1 - Preheat oven to 350 deg F. Line a baking dish with parchment paper or a foil and spray it with some cooking oil.

Step 2 - Crack 3 eggs in a bowl and whisk them together. Keep aside.

Step 3 - In a large bowl, add the melted butter, cocoa, coffee powder (if using) and sugar and whisk them together till they all combine.

Step 4 - Add in the eggs and the vanilla extract. Whisk together again till well combined.

Step 5 - Add in the pinch of salt and flour. Replace the whisk with a wooden spoon or spatula and mix in together till well combined. Do not over mix. If you do, the brownies will fall flat while baking and that is not what we are getting at.

Step 6 - Pour the batter into the lined baking dish and place it in the oven for 25-30 mins or till a toothpick inserted in the center of the dish comes out with some moist crumbs.

And we are done!
Chop them into large chunks when they cool down and serve warm or cold.


Happy cooking everyone!

Tips:
I know I am repeating myself here, but do not over mix the batter. We don't want the brownie to be super dense and gooey here. A normal hand whisk works much better than an electric whisk.

If you do not have granulated sugar, you can replace it with normal coarse sugar (regular sugar in India). Just remember that when you add it in the butter in Step 2, you keep whisking it till the sugar blends in.

If you plan to add in some nuts, do so at Step 5, once the flour is well incorporated. And you do not have permission to over mix even here! :)

Saturday, April 9, 2011

Shevayanchi Kheer (Vermicelli Porridge)

One of the most homely dessert I know!
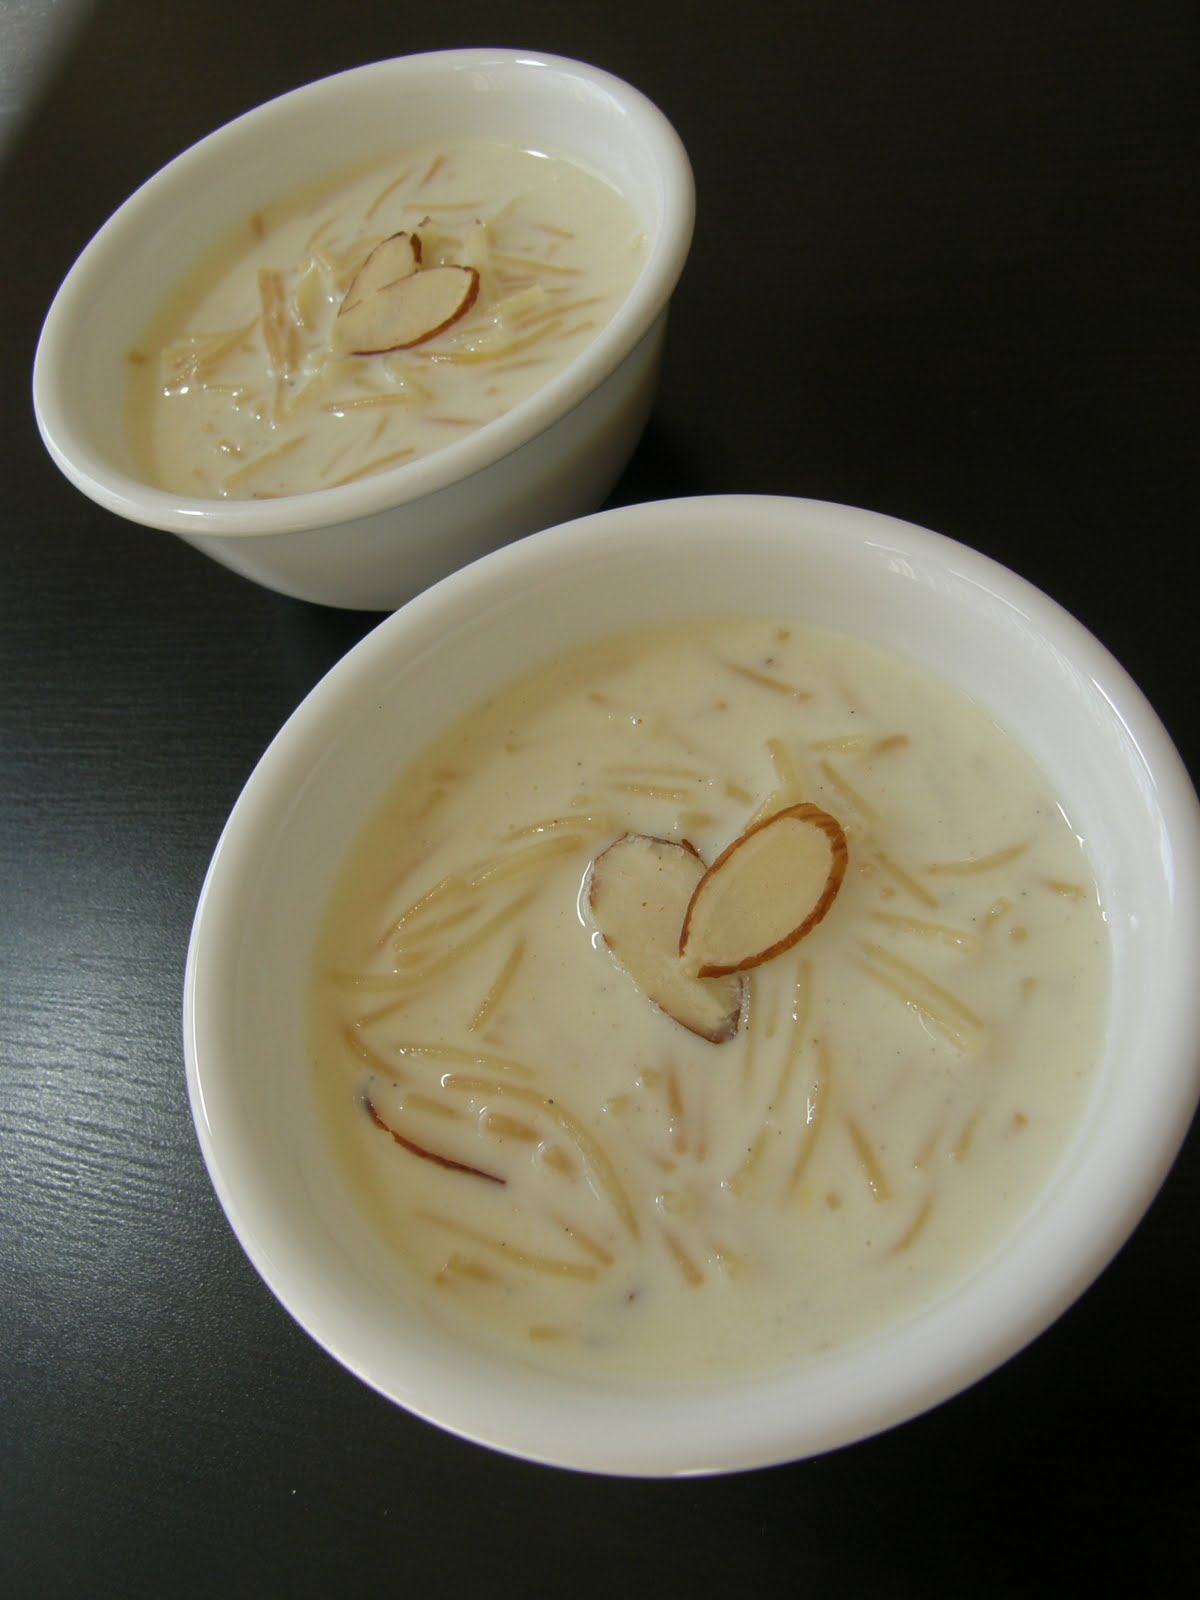
This dessert is a quick sweet dish that can be had hot or cold. The ingredients being so simple and regular, this kheer can be made quickly without much pre-planning.

You can find two kinds of vermicelli in stores. One is the plain variety and one is the roasted variety. I have not had great results with the roasted variety, so I generally stick to the plain vermicelli. Moreover it is super simple to roast these. So why bother!

Don't forget to read the few tips right below the recipe before you get started.

Here is how to make this quick dessert.

Serves: 6 to 8 people
Level: Simple


Ingredients:
3/4 tsp clarified butter (ghee/tuup)
1 cup vermicelli
5.5 cups milk (I used 2%)
1/2 tsp cardamom powder
2 pinches saffron (optional)
12 tblsp sugar (or to taste)
4 tblsp chopped or sliced nuts (I used almonds)

Method:
Step 1 - In a heavy bottomed pan, heat some clarified butter on medium heat. Add the vermicelli and roast these till they turn to a light brown color. Keep constantly stirring else you might burn the vermicelli, which can totally ruin the taste of the kheer.

Step 2 - Add the milk slowly and bring it to a boil. Keep stirring the mixture slowly and regularly. When the milk comes to its first boil, add the saffron, sugar and 3 tblsp chopped nuts. Boil for 15 mins. Do not forget to stir. You don't want the milk to burn at the bottom.

Step 3 - After the 15 mins sprinkle some cardamom powder and stir well.

Serve hot, warm or cold dressed with the remaining 1 tblsp chopped nuts!

Heavenly!


Tips:
You don't want to use more than the stated quantity of clarified butter. Unfortunately it creates an oily cover over the top surface of the kheer.

If you have roasted vermicelli at home, don't go hunting for plain vermicelli. Just add them together with the milk and continue with the remaining process.

If you are using cashew nuts and not almonds like I did, roast them in the clarified butter in step 1.

I actually time the 15 mins boiling. This gives it a perfectly thick consistency when the kheer cools down.

As the kheer cools down, the vermicelli soaks in a lot of milk. If you want a thinner consistency kheer, add milk and bring it to a boil once before serving.