Once a dish of the royals, today the 'Biryani' reflects local sensibilities and traditions and is a very popular and common dish.
India has witnessed many invaders and with every invader came a different culture and a new cuisine. Muslim invaders like Turks, Arabs, Persians and Afghans introduced the culture of feasts to India. The Mughlai cuisine that India is famous for developed from the 15th century to about the 19th century during the reign of the Mughals. The Mughals raised cooking to an art form, introducing several recipes to India like biryani, pilaf and kebabs.
While 'Biryani' is popularly associated with the Mughals, there is some historical evidence to show that there were similar rice dishes prior to the Mughul invasion.
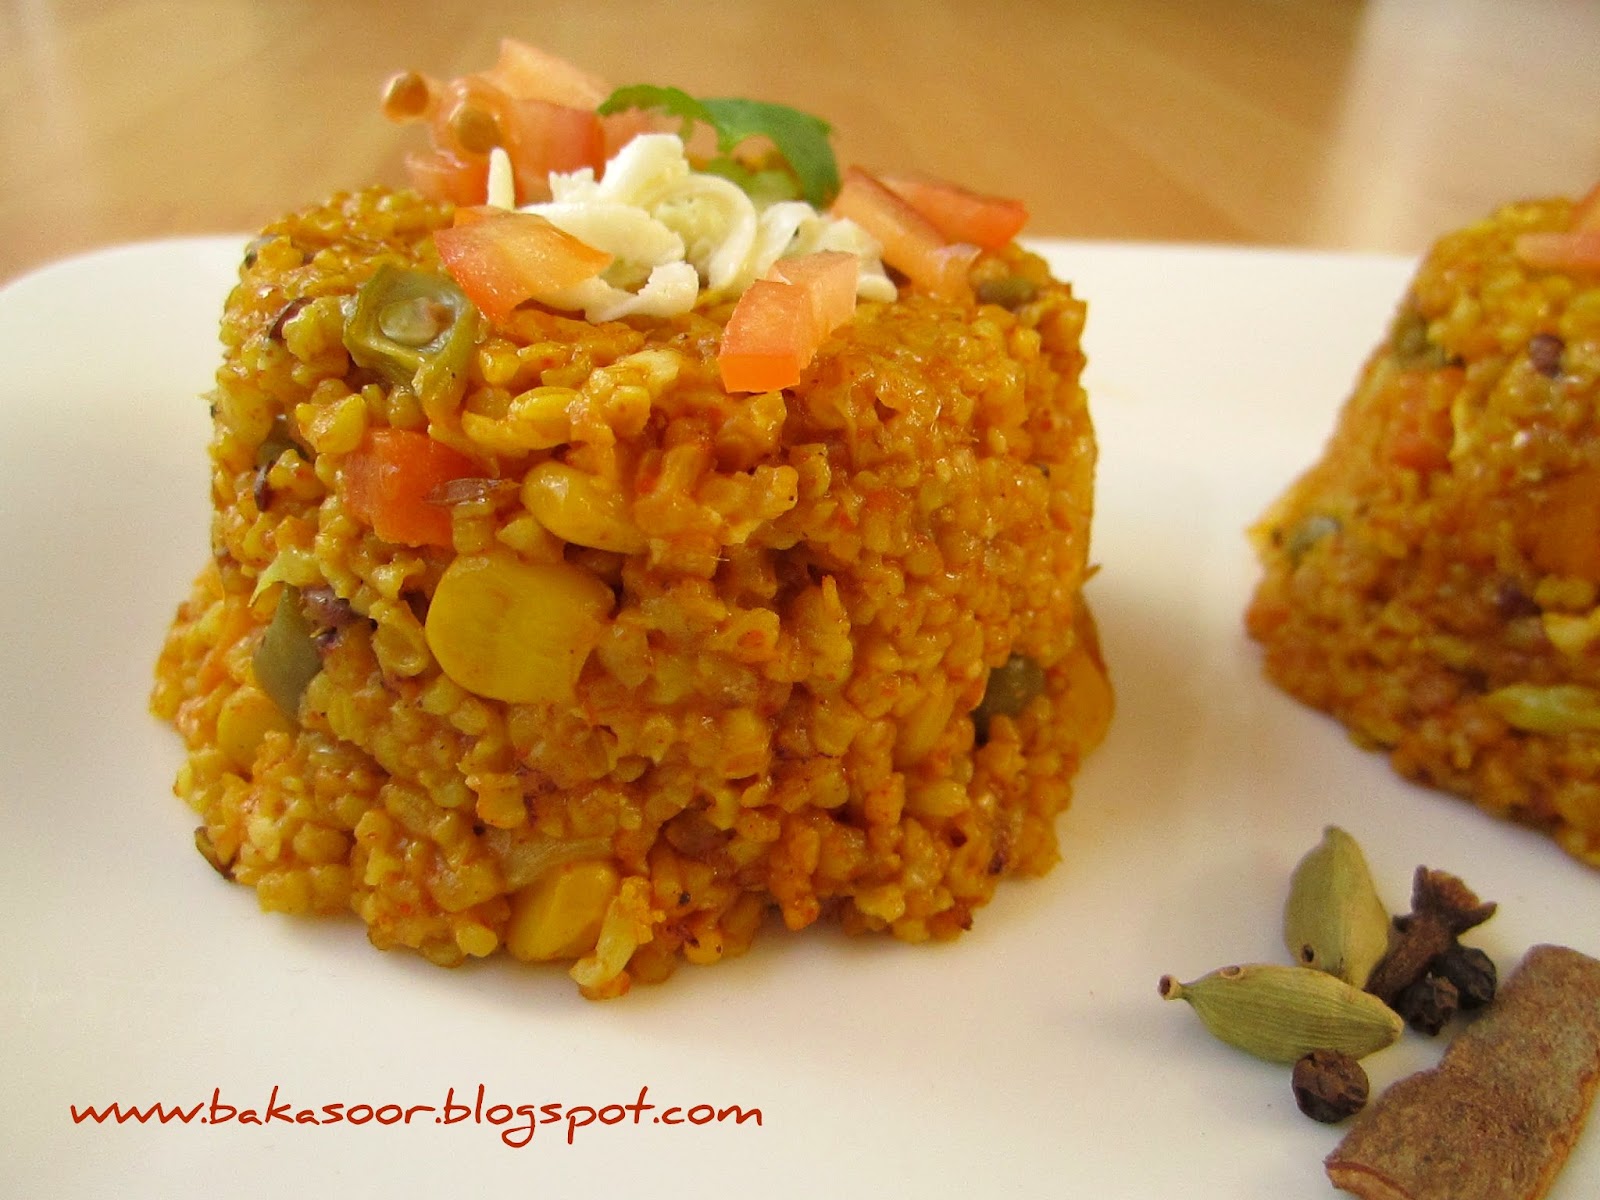
Let us begin our royal journey into history with some simple 'Biryani' recipes to boost our confidence. Nothing better to start off with than - Egg Biryani!
Egg Biryani unlike Meat Biryani always fails to impress due to the lack of flavoring. We need to understand that unlike meat, eggs are not going to share any of it's flavor with the rice or the masala. Due to this reason, we need to prepare a very flavorful concoction to help an Egg Biryani impress you. This is one such recipe. A definite keeper!
When I first started trying out 'Biryanis', the main thing that bothered me was the 90% cooked rice bit! What is 90%! How am I supposed to know I din't cook it 80% or 95%...? Sounds familiar? This kept me from trying out 'Biryanis' for far too long... until I came across the 1:1.5 method. Every 1 cup of rice will use 1.5 cups of water instead of 2. This ensures that the rice cooks 90% and the grains can stay separate. The remaining 10% gets cooked when all the assembled layers are cooked on 'dum'. Will break this down for you when we make this Biryani.
Ideally, Long grain or Basmati rice are used in 'Biryani' preparations. But we usually do not have it lying around at home. So unless I am feeding a crowd, I use the regular rice we have at home (Kolam). Please feel free to use Basmati rice for a prettier outcome.
Level: Easy
Serves: 5 - 6 people
Adapted from: ReadySteadyEat

Ingredients:
For the rice:
- 1. 5 cups rice (Soaked in water for 10 mins and then drained)
- 2.5 cups water
- 2 tsp ghee/clarified butter
- 2 green cardamoms
- 4 cloves
- 6 black peppercorns
- 1 inch cinnamon stick
- 2 bay leaves
- 3/4 tsp salt
For the Egg Masala:
- 6 hard boiled eggs, Sliced into 2 lengthwise
- 3 tsp ghee
- 1.5 tsp oil
- 1 large onion, finely chopped
- 2.5 tsp ginger garlic paste
- 2 green chillies, finely chopped
- 1. 5 tblsp cashewnuts, broken
- 1/2 tsp turmeric powder
- 1 tblsp coriander powder
- 1 tblsp cumin powder
- 1 tsp red chilly powder
- 1.5 tsp garam masala (any kind)
- 1 tblsp tomato paste (or 1/4 cup tomato puree/1 tomato, finely chopped)
- 1/4 cup yogurt, lightly beaten
- 3 tblsp fresh coriander leaves, finely chopped
- 6 - 7 fresh mint leaves, roughly chopped
- Salt to taste
For Layering:
- 1.5 tblsp ghee
- 2 large onions, thinly sliced (or more if desired)
- 1/4 cup coriander leaves, finely chopped
- 3 - 4 mint leaves, finely chopped
- 1/2 tsp garam masala powder
- 1/4 cup milk
- 2 pinch saffron strands
Method:
LAYERING -
Step 1 - We will begin with our layering prep. Warm the milk in the microwave for 10 seconds. Add saffron and let it soak till needed. (At least 30 mins)
Step 2 - Fry the onions in oil till they turn deep brown and drain onto a paper towel. Do not let them stay clumped. Separate them a little with a spoon or fork. This will ensure that they crisp up as they cool down. Keep aside.
RICE -
Step 3 - Let us work on our rice. Start heating water in the microwave or stove top till it boils. While this is happening, heat ghee in a pressure pan. Add the cardamom pods, cloves, black peppercorns, cinnamon stick and bay leaves. Saute for a few seconds till they sizzle. Add the drained rice. Fry for 2 - 3 mins. Add the boiling water and salt. Mix well. Pressure cook for 2 whistles. When done, separate the rice grains lightly with the back of your spoon or with a fork. Remove them onto a large plate and keep aside. We will be using the same pan to cook the egg masala and the final layering.
Due to the 1:1.5 ratio of rice and water used, the rice will be 90% cooked when done. We will cook the final 10% with all the eggs and spices post layering.
EGG MASALA -
Step 4 - Heat the ghee and oil in your pressure pan. Add onions and saute till they turn transparent. Add ginger garlic paste and green chillies. Saute till the mixture turns light brown. Add the turmeric powder, coriander powder, cumin powder and red chilly powder. Saute till the mixture turns deep brown. Add a few tsps of water if you think the masala is sticking to the bottom and burning. Add the tomatoes. Reduce heat to medium low and let this mixture cook till the masala leaves oil.
Step 5 - Add cashewnuts and salt. Mix well. Add the lightly beaten yogurt. Mix again. Add mint and coriander leaves. Taste and adjust salt.
Step 6 - Place the eggs in the masala and lightly toss them with a spoon till the masala coats them well. Do not overwork them. We do not want to separate the yolks from the whites.
FINAL ASSEMBLY -
Step 7 - Remove half the egg mixture from your pressure pan into another bowl. The other half of the egg masala will be your bottom layer. Spread out half the rice over the egg masala. From the layering tab, sprinkle half the fried onions, half the coriander leaves, half the mint, half the garam masala, half the ghee and half of the saffron milk mixture. Place the remaining egg masala on your rice layer and repeat the process. Remainder rice, fried onions, coriander leaves, mint leaves, garam masala, ghee and saffron milk mixture.
Step 8 - Place a large pan on medium low heat. Once it heats up, place your covered pressure pan without the whistle over it. Cook for 20 mins. This type of indirect cooking ensures that the masala at the bottom does not burn.
Alternatively, you can do the layering in your rice cooker and cook covered for 20 mins. It will switch from the cook mode to warm in 3 - 4 mins, but we have to let it continue cooking on warm till we hit our 20 mins time frame.
Both methods give excellent results. So use whichever you think works for you.
Right before serving, lightly mix the mixture with the back of a large spoon. Make sure you do not break the eggs or the rice grains.
Serve hot with some yogurt or raita of you choice.

Hope this biryani impresses your family as much as it did mine!
Happy Cooking Everyone!
Biryani info: Here!
India has witnessed many invaders and with every invader came a different culture and a new cuisine. Muslim invaders like Turks, Arabs, Persians and Afghans introduced the culture of feasts to India. The Mughlai cuisine that India is famous for developed from the 15th century to about the 19th century during the reign of the Mughals. The Mughals raised cooking to an art form, introducing several recipes to India like biryani, pilaf and kebabs.
While 'Biryani' is popularly associated with the Mughals, there is some historical evidence to show that there were similar rice dishes prior to the Mughul invasion.
Let us begin our royal journey into history with some simple 'Biryani' recipes to boost our confidence. Nothing better to start off with than - Egg Biryani!
Egg Biryani unlike Meat Biryani always fails to impress due to the lack of flavoring. We need to understand that unlike meat, eggs are not going to share any of it's flavor with the rice or the masala. Due to this reason, we need to prepare a very flavorful concoction to help an Egg Biryani impress you. This is one such recipe. A definite keeper!
When I first started trying out 'Biryanis', the main thing that bothered me was the 90% cooked rice bit! What is 90%! How am I supposed to know I din't cook it 80% or 95%...? Sounds familiar? This kept me from trying out 'Biryanis' for far too long... until I came across the 1:1.5 method. Every 1 cup of rice will use 1.5 cups of water instead of 2. This ensures that the rice cooks 90% and the grains can stay separate. The remaining 10% gets cooked when all the assembled layers are cooked on 'dum'. Will break this down for you when we make this Biryani.
Ideally, Long grain or Basmati rice are used in 'Biryani' preparations. But we usually do not have it lying around at home. So unless I am feeding a crowd, I use the regular rice we have at home (Kolam). Please feel free to use Basmati rice for a prettier outcome.
Level: Easy
Serves: 5 - 6 people
Adapted from: ReadySteadyEat

Ingredients:
For the rice:
- 1. 5 cups rice (Soaked in water for 10 mins and then drained)
- 2.5 cups water
- 2 tsp ghee/clarified butter
- 2 green cardamoms
- 4 cloves
- 6 black peppercorns
- 1 inch cinnamon stick
- 2 bay leaves
- 3/4 tsp salt
For the Egg Masala:
- 6 hard boiled eggs, Sliced into 2 lengthwise
- 3 tsp ghee
- 1.5 tsp oil
- 1 large onion, finely chopped
- 2.5 tsp ginger garlic paste
- 2 green chillies, finely chopped
- 1. 5 tblsp cashewnuts, broken
- 1/2 tsp turmeric powder
- 1 tblsp coriander powder
- 1 tblsp cumin powder
- 1 tsp red chilly powder
- 1.5 tsp garam masala (any kind)
- 1 tblsp tomato paste (or 1/4 cup tomato puree/1 tomato, finely chopped)
- 1/4 cup yogurt, lightly beaten
- 3 tblsp fresh coriander leaves, finely chopped
- 6 - 7 fresh mint leaves, roughly chopped
- Salt to taste
For Layering:
- 1.5 tblsp ghee
- 2 large onions, thinly sliced (or more if desired)
- 1/4 cup coriander leaves, finely chopped
- 3 - 4 mint leaves, finely chopped
- 1/2 tsp garam masala powder
- 1/4 cup milk
- 2 pinch saffron strands
Method:
LAYERING -
Step 1 - We will begin with our layering prep. Warm the milk in the microwave for 10 seconds. Add saffron and let it soak till needed. (At least 30 mins)
Step 2 - Fry the onions in oil till they turn deep brown and drain onto a paper towel. Do not let them stay clumped. Separate them a little with a spoon or fork. This will ensure that they crisp up as they cool down. Keep aside.
RICE -
Step 3 - Let us work on our rice. Start heating water in the microwave or stove top till it boils. While this is happening, heat ghee in a pressure pan. Add the cardamom pods, cloves, black peppercorns, cinnamon stick and bay leaves. Saute for a few seconds till they sizzle. Add the drained rice. Fry for 2 - 3 mins. Add the boiling water and salt. Mix well. Pressure cook for 2 whistles. When done, separate the rice grains lightly with the back of your spoon or with a fork. Remove them onto a large plate and keep aside. We will be using the same pan to cook the egg masala and the final layering.
Due to the 1:1.5 ratio of rice and water used, the rice will be 90% cooked when done. We will cook the final 10% with all the eggs and spices post layering.
EGG MASALA -
Step 4 - Heat the ghee and oil in your pressure pan. Add onions and saute till they turn transparent. Add ginger garlic paste and green chillies. Saute till the mixture turns light brown. Add the turmeric powder, coriander powder, cumin powder and red chilly powder. Saute till the mixture turns deep brown. Add a few tsps of water if you think the masala is sticking to the bottom and burning. Add the tomatoes. Reduce heat to medium low and let this mixture cook till the masala leaves oil.
Step 5 - Add cashewnuts and salt. Mix well. Add the lightly beaten yogurt. Mix again. Add mint and coriander leaves. Taste and adjust salt.
Step 6 - Place the eggs in the masala and lightly toss them with a spoon till the masala coats them well. Do not overwork them. We do not want to separate the yolks from the whites.
FINAL ASSEMBLY -
Step 7 - Remove half the egg mixture from your pressure pan into another bowl. The other half of the egg masala will be your bottom layer. Spread out half the rice over the egg masala. From the layering tab, sprinkle half the fried onions, half the coriander leaves, half the mint, half the garam masala, half the ghee and half of the saffron milk mixture. Place the remaining egg masala on your rice layer and repeat the process. Remainder rice, fried onions, coriander leaves, mint leaves, garam masala, ghee and saffron milk mixture.
Step 8 - Place a large pan on medium low heat. Once it heats up, place your covered pressure pan without the whistle over it. Cook for 20 mins. This type of indirect cooking ensures that the masala at the bottom does not burn.
Alternatively, you can do the layering in your rice cooker and cook covered for 20 mins. It will switch from the cook mode to warm in 3 - 4 mins, but we have to let it continue cooking on warm till we hit our 20 mins time frame.
Both methods give excellent results. So use whichever you think works for you.
Right before serving, lightly mix the mixture with the back of a large spoon. Make sure you do not break the eggs or the rice grains.
Serve hot with some yogurt or raita of you choice.

Hope this biryani impresses your family as much as it did mine!
Happy Cooking Everyone!
Biryani info: Here!