Showing posts with label Accompaniments. Show all posts

Wednesday, March 22, 2017

Kobichi Bhaji (Cabbage stir-fry)

'Kobichi Bhaji' is a very quick and simple stir-fry preparation that is made almost in every Indian home.
The recipe that I have shared is a typical Maharashtrian preparation and has minimal spices that helps the taste of cabbage shine through.

Cabbage is very low in saturated fat and cholesterol and a good source of fiber. That makes it a great choice if you are watching your weight.

The addition of cumin, green chilies and gram dal (chana dal) makes this mild vegetable very flavorful and interesting. This preparation tastes great with some hot rotis smeared with ghee.

Moving on to the recipe...

Source: Aai
Level: Easy
Serves: 4 people


Ingredients:
1 medium cabbage, roughly chopped
4 tblsp chana dal, soaked in water for min. 4 hours
3/4 tsp cumin seeds
1/4 tsp asafoetida
3/4 tsp turmeric powder
3 - 4 green chilies
6 - 8 curry leaves
2 tblsp oil
Salt to taste
Coriander to decorate

Method:
Step 1 - In a flat bottomed pan, heat oil on medium heat. Add in the cumin seeds and let them sizzle. Add the asafoetida, green chilies and curry leaves. Saute for a few seconds.

Step 2 - Add the turmeric powder. Saute for a few more seconds. Quickly add the chopped cabbage and the soaked chana dal. Toss everything well till the spices coat all of the cabbage. Cook covered for 5 - 10 mins stirring occasionally.

Step 3 - When the cabbage cooks down, add salt and increase the heat. Saute the cabbage for 2 - 3 more mins. Turn off the heat and decorate with some coriander.

And we are done!
Serve hot with some hot rotis.

Tips:
The cabbage starts leaving water as soon as you add salt. More so with the variety you find in the US than in India. So I would recommend adding the salt after the cabbage is almost done and then increase the heat for further cooking. We will cook the cabbage for no more than 2 - 3 mins once the salt is added.

You can replace the green chilies with red chilly powder to get a different flavor. Add the powder when you add turmeric. Make sure you do not burn the spices.

You can skip the soaked chana dal (especially if you have forgotten to soak them before hand).
But traditionally this dish is made with soaked chana dal at our home and I do like some added protein in my 'kobichi bhaji'.
That being said, I have come across recipes that add chana dal (not soaked) directly in the oil with the green chilies and curry leaves. Personally not a fan of the crunchy lentil contrast in this soft vegetable. But you can try it!


Saturday, March 7, 2015

Malwani Kala Watana Amti (Traditional black peas curry)

'Kala Watana' or black peas is my favorite vegetarian delicacy from Malwan - a coastal town in Maharashtra. It is a roasted coconut based mildly spiced curry typically had with 'amboli' - a thick slightly sour pancake made out of rice flour.

Black peas are not to be confused with black chickpeas that are easily available in the indian grocery stores in the US. Till date, I have not found these in any of the regular or specialty stores that I have been to. But being a fan, I always get black peas from India.
That being said, who is to say that you cannot make this dish if you don't have access to black peas. Go ahead and make these with any beans that hold shape really well, like black or green chickpeas.

'Kala watana' are much harder than your regular peas and hence hold shape really well even when cooked for longer periods.
The masala (Bhajani) I use in this recipe is the traditional malwani masala that we usually use in our meat curries at home. The addition of cashewnuts is again very authentic to this curry, so try not to skip these. I am sure you will love it!

Let us get to the recipe...
I have divided this recipe into three parts for easier reference. First part is the pre-preparation, then details on how to go about making your masala and the last part discusses the curry preparation.

Source: Aai
Level: Medium
Serves: 5 - 6 people


Ingredients:
Part 1 - Pre-preparation:
1.5 cups black peas
4 cups water

Method:
Step 1 - Wash the black peas thoroughly under running water. Soak these under 4 cups of water or till the black peas are well submerged and leave them to plump up for a good 6 - 7 hours. Once done, drain the black peas and use them in your curry or keep them in a vacuum sealed box in your refrigerator if you do not plan to use it immediately. They stay well for 2 - 3 days.

Part 2 - Bhajani (1 portion)
1/2 cup fresh grated coconut OR 1/4 cup dry grated coconut
3/4 cup onions, roughly chopped
7 peppercorns
4 cloves
1.5 inch cinnamon stick
2 tsp coriander seeds
1.5 tsp poppy seeds
1 tblsp oil

Method:
Step 1 - In a flat pan, on medium heat add  the peppercorns, cloves, cinnamon stick, coriander seeds and poppy seeds. Dry roast these spices till the coriander seeds and poppy seeds turn brownish. Take them off the pan and place them in a plate to cool off.

Step 2 - In the same pan, heat 1 tblsp oil. Add the onions and stir fry continuously on medium-high heat till they turn brown all over.

Step 3 - Once the onions get properly browned, turn the heat down to medium and add the grated coconut and saute continuously till the whole mixture gets a deep brown color. Do not let this mixture burn. Add the spices from Step 1. Mix everything together for a minute and remove this mixture onto a plate to cool down.

Step 4 - Grind this mixture in a blender with as little water as needed to form a smooth paste.

This is your basic 'Bhajani' or Coastal Masala !

Tips: The color of your curry is dependent on the color of this bhajani mixture. So make sure you roast the ingredients really well.

Ingredients:
Part 3 - Black peas curry:
Soaked black peas (instructions above)
1 portion Bhajani (recipe above)
1 small onion, finely chopped
2 tblsp broken cashewnuts
1.5 tblsp oil
3/4 tsp mustard seeds
2 pinches asafoetida
1/4 tsp turmeric powder
1 tsp red chilly powder, or to taste
3/4 tsp jaggery
1 tsp concentrated tamarind pulp
Salt to taste
Coriander to decorate

Method:
Step 1 - Heat oil in a pressure pan. Add the mustard seeds. When they splutter, add the asafoetida, turmeric powder, cashewnuts and onions. Saute till the onions turn transparent.

Step 2 - Add the red chilly powder. Saute well. As we have used less oil, your spices might start burning. Sprinkle some water into your pan if needed, to prevent the burning.

Step 3 - Add the soaked black peas, bhajani paste and 3/4 cup of water. Mix well and saute for 5 - 6 mins. Add the jaggery and tamarind pulp. Mix again. Then add enough water till all the peas are a just below the liquid. Mix well and pressure cook for 2 whistles or till the peas are well cooked. Do not overcook the peas. The peas should be easy to crush when pressed, but should not break easily when you just stir them around a little. Adjust the taste and consistency as desired at this point. The curry needs to be spicy with a very slight hint of sweet (jaggery) and sour (tamarind). Decorate with coriander leaves.

Serve piping hot with some 'ambolis' or steamed rice. Heaven!
I usually make pancakes (thick dosas) using store bought idli batter to make pseudo 'ambolis'. They serve the purpose well.

Hope this recipe brings a little Malwan into your homes.

Friday, February 27, 2015

Sol Kadhi

'Sol kadhi bhaat and bazlela masa' - 'sol kadhi' rice with fried fish, is a dream menu of mine. Needless to say, it a regular at my home. A must have when I visit my parents back home. 

'Sol kadhi' is a digestive drink with it's roots in coastal Maharashtra. Quick to make, 'sol kadhi' is a perfect appetizer for those hot summer days.

'Sol' refers to 'Kokum' or 'Amsool'. It comes from a fruit bearing tree called Garcinia indica. The fruit from this tree is dried in the sun to get 'kokum'. It is used as the primary souring agent in Maharashtrian coastal foods. Tamarind, though not so common even now, is a recent replacement.

You really have to taste an authentic 'sol kadhi' before you try this recipe out. You cannot jump in blind here as every ingredient is to taste and has different levels of flavor in different regions. 
It is easy to get your hands on fresh coconut and 'kokum' in India. Making 'sol kadhi' is always convenient there. But trust me you can make an almost authentic 'sol kadhi', even when you do not have access to a few fresh ingredients. Let me make this simpler.. If you get your hands on some dry 'kokum', you are good to go.

Before we start, even if you think the 'sol kadhi' that we make in India is a little more tedious and time consuming, remember that there is a reason why it tastes so great! So do take that little extra effort in straining fresh coconut milk. The color of the 'sol kadhi' depends on the 'kokum' quality. Poor quality will give you a fainter pink. Do not fuss too much over it. It will still taste the same. 

Let me share my secrets to making a great 'sol kadhi' in India and beyond!

Source: My family
Level: Easy
Serves: 2 - 3 people


Ingredients (When NOT in India):
250 ml coconut milk, details below
10 - 12 dry kokum, details below
1 cup water, or as required.
5 - 6 garlic cloves
2 green chillies
Salt to taste
Coriander for decoration

Method:
Step 1 - In a small pot, add 3/4 cup of water and the dry kokum. Start heating the pot and let this mixture boil for a good 5 - 6 mins. Turn off heat and leave it aside to cool. 

Step 2 - Drain the water and keep this water for later use. Also, grind the cooked kokums till they form a rough paste. Keep this aside too.

Step 3 - Grind together the garlic cloves and green chillies with a little water till it forms a smooth paste. Keep aside.

Step 4 -  Now we are all set. In a larger bowl, pour in the coconut milk. Pour in the kokum water from step 2, garlic-green chilly paste and salt. Mix well. Start tasting the kadhi. If you find your sol kadhi a little less sour, start adding the ground kokums from step 2. Keep adding and mixing till you get your desired sourness. Always remember that the kokums will keep making your kadhi more sour over time. So do not add too much if you plan to consume the sol kadhi at a later time.

Step 5 - Once all the flavor is adjusted, strain the sol kadhi. Decorate with chopped coriander and refrigerate till you want to serve it. If you plan to indulge with rice, I would suggest getting the sol kadhi down to room temparature.

Tips: 
Sol Kadhi is usually of a very thin watery consistency. So adjust water as desired.

Coconut milk - Usually we do not have access to freshly grated coconut outside India. Using frozen freshly grated coconut according to me, compromises the taste. I found Aroy-D to be the only brand from all those I have tried, which claims to be 100% pure coconut milk (no preservatives). You should easily find these in the Asian markets. That being said, I have made sol kadhi with canned coconut milk and also with coconut milk powder before I met Aroy-D. Small compromises on the taste.

Kokum - These quantities are for the not-so-great kokums we get in Indian stores in the US. 

Now, moving on to perfection...

Ingredients (When IN India):
1 small coconut, freshly grated
5 - 6 kokum, details below
Water as needed
5 - 6 garlic cloves
2 green chillies
Salt to taste
Coriander for decoration

Method:
Step 1 - In a large blender bowl, grind together the coconut, garlic and green chillies. Add 1.5 cups of warm water. Grind for a good 3 - 4 mins. Strain the coconut through a fine mesh and squeeze out the fresh coconut milk. Keep this thick coconut milk aside. This will be your first extract.

Step 2 - Now for the second extract, add back the squeezed out coconut into the blender bowl. Add 3/4 cup warm water and grind it for 2 - 3 mins. Strain the coconut again through a fine mesh to squeeze out the coconut milk. Add this to the thicker coconut milk from step 1.

Step 3 - To the coconut milk, add salt and decorate with coriander. Refrigerate till you want to serve. If you plan to indulge with rice, I would suggest getting the sol kadhi down to room temperature before you serve it.

Tips: 
Sol Kadhi is usually of a very thin watery consistency. So adjust water as desired.

The kokum used here is the good quality kokum that you get in India. 

Indulge by itself or with some hot steamed rice!
Hope you enjoy making this recipe.  Happy cooking everyone!

Notes:
I have heard of people giving a cumin seeds tadka to the prepared sol kadhi before serving. Feel free to try that, but that is not how any of my family members prepare this drink. Just sayin...

Adding a little food color into the sol kadhi to look glamorous..is according to me an absolute NO NO! Authentic sol kadhi has no ingredients that will make it look shocking pink like it does in restaurants!

Friday, February 7, 2014

Matki chi Usal (Stir fried moth beans)

Pulses are low in fat and cholesterol, high in dietary fiber and rich in protein. This makes them a fantastic heart healthy food choice.

Indian cooking incorporates a lot of pulses in it's cuisines. Especially regional cuisines. You might not find all pulses at most of the restaurants but you will surely find them in most homes.

I enjoy making pulses for our regular lunch and dinners, mostly because there is minimal or no chopping required. Just soak the pulses in water and a few hours later, you are ready to use them.

The recipe I am sharing today is a simple one I cook almost once a week at our home mostly because of it's simplicity. This recipe has No Onion and No Garlic, which makes it ideal for days when you choose to offer it as 'Naivedya'  to God on auspicious days. I personally follow this recipe as it involves no chopping! Couldn't ask for more on a busy day.

Level: Easy
Serves: 4 - 5 people


Ingredients:
3/4 cup matki (moth beans), soak in a lot of water overnight or for 6 - 7 hrs.
1 tblsp oil
1/2 tsp mustard seeds
1/2 tsp cumin seeds
2 pinch asafoetida
6 - 7 curry leaves
1/4 tsp turmeric powder
1 tsp red chilly powder, or to taste
1.5 tsp goda masala, or to taste
2 - 3 kokum/ Juice of 1/2 lemon
1/4 tsp jaggery (optional)
Water as required
Salt to taste
Coriander to decorate

Method:
Step 1 - Heat oil in a pot. Add mustard seeds and let them splutter. Add cumin seeds and let them sizzle and turn a little brown. Add the asafoetida and curry leaves. Stir for a couple of seconds.

Step 2 - Add the turmeric powder. Stir for a second and immediately add the drained, soaked matki. Saute for 2 mins. Add the red chilly powder and saute for 2 - 3 mins. If you notice that the mixture is too dry and the spices might burn, sprinkle some water over the mixture and keep mixing. Then add enough water, such that the matki are almost all under water. Reduce heat to medium low, cover and let the matki cook well. Keep mixing occasionally.

Step 3 - Once you notice the water has substantially reduced and your matki is almost cooked, add in the goda masala, jaggery, kokum and salt. Mix well. Cook till the matki is well done. This can be checked by lightly pressing a few matkis. They should easily give way, but should not be all mashed up.

Decorate with coriander, squeeze some lemon if you are not using kokum and serve with some hot rotis.

Tip:
Do not add the kokum or jaggery before the matki are almost cooked, this could prevent the pulse from cooking properly.

If you do not have goda masala, you could add some garam masala (3/4 tsp) instead. This will alter the taste of the preparation, but it will still taste great.

Some homes decorate this preparation with some fresh grated coconut. This makes for a great topping.

Using sprouted matki, would make this dish even more healthy. So if you have time, go for it.

Tuesday, September 24, 2013

Bhajaniche Thalipeeth (Multigrain Flatbread)

'Thalipeeth' is a spicy, flavorful multigrain flatbread very popular in Maharashtra. Usually accompanied with a huge dollop of 'loni' or yogurt, I am yet to come across anyone who doesn't fall in love with this dish.

Every family has it's own secret recipe for the Bhajani (spiced multigrain flour) which is used to make these flatbreads. A combination of spices, lentils and grains are first roasted on low heat and then ground to a fine powder. This flour is then kneaded along with onions, green chillies and some more spices to form 'Thalipeeth'.

The main thing to remember before you make 'thalipeeth' is that, due to the lack of gluten in the dough, you will have to pat the dough into shape with your fingers as you will not be able to roll it out into discs. This will be a little more time consuming than your regular roti making, but it is going to be so sooo worth it. Trust me on this one!

I usually use the 'K-Pra' or 'Bedekar' thalipeeth flour which we get very easily in the Indian grocery stores around the place we stay. But if you don't find one around your home, do email me and I will be more than happy to share my familiy's thalipeeth bhajani recipe with you.

So let us get started..


Level: Medium
Serves: 8 - 10 medium thalipeeth
Source: Aai (Vandana Thakur)

Ingredients:
2 cups thalipeeth bhajani (any kind. I used 'K-Pra')
2 tsp oil
Water for kneading, as required
1 tsp yogurt
1/2 tsp goda masala (optional)
1 medium onion, finely chopped
2 stalks of spring onion greens, finely chopped
2 - 3 green chillies, finely chopped
1/2 cup coriander leaves, finely chopped
Salt to taste (I din't use any as my Thalipeeth bhajani had salt added in it)
Aluminium foil/Parchment paper
Oil for pan frying

Method:
Step 1 - Place the thalipeeth bhajani in a large plate or pot. Add 2 tsp oil and mix well. Add the yogurt, goda masala (if using), onions, spring onion greens, green chillies and coriander leaves. If your bhajani does not have salt added to it, do add some at this point. Mix well using your hands or a spoon.

Step 2 - Knead the flour into a soft dough with water. Use water sparingly. The dough is not going to be elastic like your regular chapati dough. Due to this, it may not form into a ball. To check if your dough is ready, gather a large lump of dough in your palms and press it lightly. If it holds shape, you are done.

Step 3 - Place a parchment paper or an aluminium foil over your rolling board. Pour a few drops of oil onto the sheet and spread it around. This will ensure that the thalipeeth does not stick. At the same time, start heating a pan on medium heat to roast the thalipeeth.

Step 4 - Grease your hand with a little oil. Take a fairly large sized dough (around 3 tbslp) and roll it into a smooth ball in your palms. Place the ball onto your well greased rolling board. Grease your fingers with a little oil and start lightly pressing the dough into a disc. This will be really easy as the dough would be very soft. You might notice that the corners keep cracking. Don't fuss over it. The dough is very forgiving. Just patch the cracks into place. If you think your hands have started sticking to the dough, grease it again with some more oil. Try your best to flatten the thalipeeth evenly. Flatter the disc, crispier the thalipeeth. Once done, form a small hole in the center of your thalipeeth.

Step 5 - Lightly pick up the parchment paper or foil you are using and carefully flip the flatbread onto your palm. Slowly place the thalipeeth from your palm onto the hot pan. Pour a tsp of oil around the corners of the thalipeeth. Pour some oil into the hole created in the center. This will help cook and crisp the thalipeeth well. If you want your thalipeeth very crisp, you can poke 2 - 3 holes around the thalipeeth and pour oil in all the holes.

Step 6 - Once the sides of the thalipeeth turn deep brown, pour a tsp of oil over the thalipeeth and slowly flip it to let the other side cook well. Cook till both the sides, turn to a deep brown color. Do not keep flipping the thalipeeth around too many times. You could end up breaking it in the process.

Serve hot with some 'Loni' or some yogurt. Being a garlic lover, I prefer eating my thalipeeth with some spicy garlic chutney.
You can indulge in these for breakfast or as a meal. If you are in a fancy mood like I was when I made these, you can cut them into quarters using a sharp pizza cutter and serve them to your guests as appetizers!

Enjoy!


Tips:
Once you buy your thalipeeth bhajani, do read the ingredient list on your box. Some flours have salt and red chilly powder added before hand. This should help you make proper decisions regarding adding spices and green chillies.

Do grease your parchment paper/aluminium foil well before you start pressing the dough into shape. It has to come off it when you are done.

If you have fresh homemade flour, you can dip your hands in water and flatten the dough into discs, but I have not had a great experience with store bought flours and water. Due to this, I grease my hands with oil to flatten the dough into shape.
You should try using water on your first thalipeeth and check if it works for you.

Wednesday, February 27, 2013

Kheema Pattice (Turkey Patty)

These melt in the mouth pattice are everybody's favorite. Originally these pattice are made with minced goat meat at our home. As goat meat is not readily available around where I live, I have replaced it with minced turkey meat. Turkey being a healthier option than goat meat, is an added bonus.

These kheema pattice are my mother in law's specialty.  I still remember the first time she made them for me. I was in meat heaven! So moist and juicy and flavorful..I just could not have enough. Even today, inspite of learning how to make these, my MIL always makes these for me when either of us visit each other.

Just wanted to let you know a few tricks involved in making the perfect pattice, before we head to the recipe. The thumb rule to moist and juicy pattice is minimum handling. When we are mixing everything together you cannot knead the mixture like you do with your bread dough. The mixture needs to be handled with total baby love! Over handling the mixture leads to tough pattice.
Secondly, you can replace the turkey meat with any other minced meat except chicken. Using chicken compromises too much on the taste. This of course, is my personal opinion. I know people who enjoy chicken pattice made this way. I just fail to get along with these people. Don't be one of those. :)

I usually prefer rolling the pattice in bread crumbs before shallow frying them in oil. But traditionally fine semolina was used. So you can try both the options and decide what you enjoy more.

Now let us get to the recipe.

Level: Medium
Serves: 15 - 18 medium sized pattice
Source: MIL (Nita Pradhan)


Ingredients:
1 lb minced meat (I use turkey meat)

Marination:
1/2 tsp turmeric powder
2 tsp red chilly powder
1.5 tsp ginger garlic paste
1/2 tsp garam masala (any kind)
Salt to taste

Pattice ingredients:
4 tsp oil
1/2 inch cinnamon stick
2 cloves
2 pinches asafoetida
1/2 cup chopped onions
3 medium potatoes, boiled and mashed
1/2 tsp ginger garlic paste
3 slices sandwich bread (white or wheat)
Salt to taste

For rolling:
1 egg, lightly beaten
Breadcrumbs/semolina for coating

Method:
Step 1 - Place the minced meat in a large bowl. Add the turmeric powder, red chilly powder, ginger garlic paste, garam masala and salt from the marination list. Lightly mix all the ingredients till the minced meat is coated well. Refrigerate for minimum 30 mins to an hour. Do not over knead here. Over kneading makes though pattice.

Step 2 - In a pressure pan, heat 2 tsp oil. Add the cinnamon sticks, cloves and asafoetida. Immediately add the onions and stir fry till they turn light brown.

Step 3 - Add the marinated minced meat from Step 1. Saute till the minced meat loses it's pink raw color and turns whitish. Add water till the meat is just under water and pressure cook for 2 whistles or till your meat is thoroughly cooked.

Step 4 - Once the pressure pan opens on it's own without any resistance, you might find the mixture a little watery. Cook the meat mixture again on high flame till it is absolutely dry. Adjust salt once the mixture dries up. Leave aside to cool down.

Step 5 - While the meat mixture cools down, take 3/4 cup of water. Add in 1/4 tsp of salt and mix well till it completely dissolves in the water. Soak each bread slice in this water for just a couple of seconds, take them out and squeeze out the excess water. Place the wet squeezed bread into a large bowl. This along with the potatoes will help in binding our pattice together.

Step 6 - In the same large bowl, place the mashed potatoes, 1/2 tsp ginger garlic paste and cooled meat mixture from Step 4. Mix very lightly till the mixture is well combined. Taste the mixture and adjust the salt to your liking. Again, do not over handle the batter.

Step 7 - Take a tablespoon of batter in between your palms and roll the mixture lightly into any shape that you desire.

Step 8 - Let us get to the frying now. Beat the egg lightly in a bowl. Keep aside. Take a flat plate and spread out some breadcrumbs for coating.

Step 9 - Place a frying pan on heat and pour enough oil to shallow fry these beauties. The pattice should not drown in the oil, just the bases should be in contact with oil. We are not deep frying here. How do you know the oil is ready? Just drop in a few breadcrumbs in the hot oil. If they sizzle, you are ready.

Step 10 - Take each piece of pattice, first dip them in the beaten egg from both sides. Pick them up and place them in the bread crumbs. Roll these pattice well in the crumbs and place them lightly in the hot oil. Fry for just a couple of  minutes on each side as we have to just brown the breadcrumbs. We do not need to cook the pattice again. And we are done.


Serve hot with some ketchup or chilly sauce. Sit back with a glass of wine in one hand, a pattice in another and welcome yourself into my MEAT HEAVEN!

Tips:
You can roll these pattice and keep them in the refrigerator for a day or two. On  the day you plan to indulge, just fry and serve.

You can also freeze the rolled pattice and store them in the freezer for almost 2 to 3 weeks. Just thaw and fry when you need them.


Wednesday, August 15, 2012

Kakadi Pudina Raita (Cucumber-Mint Raita)

'Raita' refers to a salad with a yogurt base.
Cucumber raita is a summer special at our home. The cooling properties of this raita beautifully balances the spices in Indian cooking.
Cucumbers are a combination of dietary fibers and water. A must have for those nasty summer days!
There are infinite variations of preparing this quick dish. I will share a few of my favorite methods with you. 

Today's recipe is a particularly cooling one. Mint being one of the key ingredients, gives this dish a wonderful fresh flavor. I generally accompany this preparation with spicy biryanis or meat curries. You can also use this as a dip to be served with some sliced veggies or with some flatbreads.
This quick recipe demands to be bookmarked!

Serves: 3 - 4 people
Level: Easy


Ingredients:
2 large cucumbers, peeled and finely chopped
1.5 cups yogurt, whisked till smooth
3 tblsp chopped coriander leaves
6 - 8 mint leaves
3 green chillies, finely chopped
1/2 tsp sugar
Salt to taste
1 tsp cumin seeds

Method:
Step 1 - In a mortar and pestel, punch together the coriander leaves, mint leaves, green chilies, sugar, salt and cumin seeds. If you don't own a mortar pestel, coarsely grind the ingredients together in a grinder with no or as little water as possible. Your chutney is ready.

Step 2 - In a large bowl  add the yogurt and the coarsely ground chutney from Step-1. Mix well. Add the finely chopped cucumber. Mix everything together.

Refrigerate till you are ready to serve.

Tips:
This salad can be made ahead for a party. You can keep the yogurt-chutney mixture ready. Just before serving add the cucumber, mix well and serve.
We cannot add the cucumber and keep the salad for a long duration as the salt reacts with the cucumber and the salad starts getting watery!

Hope you enjoy this one!

Wednesday, May 9, 2012

Kairiche Lonche (Raw Mango Pickle)

Mangoes Everywhere! My favorite time of the year!
Being a fruit lover, I do enjoy the occassional Mexican or  South American mangoes we get around here. But  nothing can ever replace my love for 'Hapus Amba'  (Alphonso Mango). 
Come summer, my pantry is stocked with Alphonso mango pulps from the Indian grocery stores. Then we have a stream of Mango lassi, Mango milkshakes, Morambas (mango relish), Amras-Puri...the list does go on...
But to enjoy mangoes like we did in India, we treat ourselves with mangolicious recipes only in the summer. This way, we always look forward to summer and mangoes..Weird arn't we? :)

So to kick off this Mango-Mania of mine, I cannot think of anything better than 'Kairiche Lonche' or Raw Mango Pickle.
Eating fresh pickle totally rocks! No store-brand can ever get close to freshly made pickle. Maybe it's the love (read lack of preservatives) that we add in it!
But whenever I make pickles at home, the quantity is very little. I make pickles that can last us for just about a week. This way, we are excited about it, the freshness is intact and I don't have to bother with ways of preserving it for a longer duration which in turn would result in excess salt and oil usage. Low sodium and lesser grease can never be a bad thing!

Now let us get making some fresh homemade 'Kairiche Lonche'.

Level: Easy
Serves: 1.25 cups pickle


Ingredients:
1 large raw mango
2 tblsp oil
3/4 tsp salt
1.5 tblsp red chilly powder
1/4 tsp turmeric powder
3/4 tblsp mustard seeds powder
2 - 3 curry leaves, chopped
1/8 tsp asafoetida + 1 pinch asafoetida
10 fenugreek seeds
1 tsp mustard seeds

Method:
Step 1 - Wash and scrub the raw mango well. Wipe dry with a kitchen towel. Let it dry for an hour. Chop the mango into tiny pieces. Place it in a bowl. Keep aside.

Step 2 - Add the salt, red chilly powder, asafoetida (1/8 tsp) and mustard powder. Mix well. Every piece of the raw mango should be well coated. Be gentle here. Leave aside for 20 mins. This process softens the mango pieces as the mango releases some water due to the addition of salt.

Step 3 - In the mean time, take a small pan. Dry roast the fenugreek seeds till they slightly change color. Crush them into a rough powder either in your blender or like I did in my mortal and pestal.

Step 4 - In the same pan, heat the 2 tblsp oil. Once you are sure it is hot (not smoking), add the mustard seeds, curry leaves and a pinch of asafoetida. Quickly add in the turmeric powder. Let it heat for 2 - 3 seconds. Pour this into a small heat proof bowl. Let this cool down for 10 - 15 mins.

Step 5 - By now, the 20 mins of standing time for the spiced raw mangoes will be done. They will be nice and soft. Carefully pick out some tiny bits, look around and pop it in your mouth when noone is watching. Add the fenugreek seeds powder from Step 3 and the cooled flavored oil from Step 4. Mix well. Taste it and adjust salt and red chilly powder if you would enjoy some more.

Store in a clean container. This pickle can be enjoyed for 2 weeks, but I don't think it will last for more than one. It is sooo finger-lickin good!


Tips:
Do not pour hot oil from Step 4 onto the marinated raw mangoes. This might slightly cook them and that would change the flavor of our pickle.

In your Indian grocery stores, you get mustard seeds crushed coarsely or finely. Any variety would do for this pickle.

Wednesday, February 29, 2012

Naan-Pizzas

Sometimes leftovers can make our lives tough. Sometimes, they are too much..sometimes too little.
But why not try and make them interesting?

Crispy 'Naan-Pizzas' is the way to go for leftovers at our home. We look forward to leftovers and always have a stock of frozen naan bread in our refrigerator.
You can go crazy with this recipe! I have tried this with almost all the North Indian delicacies - Doggy bagged from a restaurant or home made.
I have tried these with Paneer Makhani, Chole, Methi Malai Mutter, Butter Chicken, Chicken Tikka Masala...you see where I am going here don't you?

So get your thinking caps on, and let's go crazy!!!

Ingredients:
2 Naan bread (I use frozen garlic naan)
Leftovers (I used Mutter Paneer here)
0.25 small onion, thinly sliced
Coriander leaves, finely chopped
1 tblsp cheese or as per taste


Method:
Step 1 - Preheat oven to 400 deg F. Cover a baking sheet with foil.

Step 2 - Place the frozen naan on the baking sheet. Spoon in the leftover gravy onto the naans. Make sure you don't go right upto the rim of the naan bread. Leave some place on the corners, so you can hold onto the naan bread while eating and also the gravy does not ooze out while baking.

Step 3 - Spread some sliced onions and cheese on top.

Step 4 - Bake these in your hot oven for 7 to 8 mins. Just pull your baking sheet out, sprinkle some chopped coriander leaves on top of your naan-pizzas and put it back in the oven for 2 to 3 mins.

Ready to serve!


Enjoy!

Thursday, February 2, 2012

Loni aka Makkhan in 10 minutes!

Let us start by understanding, how one makes Loni (makkhan or white butter) in India..

You start with whole milk (buffalo milk). As we tend to buy milk fresh or in packets in India, we have to first start by boiling it. Once the milk is boiled, we allow it to cool down and then we place it in the fridge to be used as and when required. Once the milk cools down, the cream gets collected right on the top. You skim this cream out and place it in a covered clean container. You repeat these steps every time you get milk home, till a good quantity of cream is collected. 
Then starts the butter making process. You take out the thick collected cream and start whisking or churning it. In India, traditionally, we do it with a ladle called "Ravi" in Marathi which has a flower like end that assists in churning. We keep churning this cream till all the butter separates from the buttermilk. Almost 25 to 30 mins worth of churning. Phew! Then we wash this butter with a little water, so it does not have a milky smell to it. And....we are done!

Getting back to wherever I am from, collecting cream off fresh buffalo milk...A STRETCH!
But not having 'loni' with my bhakris and thalipeeth, saddened me !
That got me thinking, even if I can't collect cream, we do get cream in tetra packs in the stores! I started my blog surfing to check if anyone has had this amazing idea! and I realized.... many of them had!
So what if I wasn't the only one with brilliant ideas, better late than never.
So I decided to go on a really short and quick journey of 'Loni' making. 
It is so ridiculously simple and you can make it whenever and as much as you desire!

Now there are certain things you should know before we get started on this 10 minute journey.
I have found from messy personal experiences that food processor is the best gadget to make 'Loni'. 
That does not in any way mean, you can't make it any other way. 
The worrisome part is at the end, when the buttermilk starts separating from the butter. There is a lot of splashing here. So if you don't have a food processor, get a tall bowl and then whip the cream, so in the end you can catch most of the buttermilk splashing all around. Though this step sounds messy, it takes place only for 2 minutes in the end. 
Also, when you use the food processor, it is ideal to use churning blades. I don't have a high-tech processor. So I used the only blade (chopping) I had and there was no problem. So don't go hunting for fancy accessories.

Level: Easy
Serves: Makes 1.25 cups


Ingredients:
1 medium pack of heavy whipping cream
3 tblsp ice cold water

Method:
Step 1 - Put the ingredients in a food processor or in a large tall bowl in which you plan to whisk the cream. Start whisking the cream.

What happens next: The cream will start getting thicker and thicker...

and then: It will be thick enough to resemble whipped cream. 

and then: It will be really thick and you may start finding it weird to keep whipping the cream as nothing seems to be moving around. But do continue.

and then: then slowly in about 5 - 7 mins, you will see the butter clumping together into thick white butter and the buttermilk will start separating and splashing around. Now go ahead and dunk in your finger. Get all excited about it....now you need to whisk just for 1 more minute.

Step 2 : Pour the ice cold water and whisk the butter again for 15 - 20 seconds to just wash the milky smell off the butter. Drain out the water and place the fresh butter in a plate.

Step 3: Start pressing the butter with a fork. This will make it release some more butter milk. Tilt the plate and  drain out the excess water. This process will make the butter harder. So do not over do this step, if you want your butter soft. 

We are done!


Ever wondered how butter making was invented?? Why would our ancestors suddenly decide they want to churn cream and see what happens?

Something I read on the internet, sounds like a feasible explanation.
Butter was probably first created accidentally when whole milk carried in skin bags was carried by horseback and naturally 'churned' while travelling over rough terrain.

The first documented mention of butter making was in the sacred songs of the dwellers of Asiatic India, dating back to 1,500 - 2,000 BC. There is a historical mention of ancient tribes creating primitive churns by horizontally agitating the cow, yak and horse milk. Butter back then was not only eaten, but used as in illumination oil, for medical purposes and also as skin coating to insulate the tribe members from the harsh winter cold. 


Wednesday, August 10, 2011

Tea Rusks

An effortless recipe!

A great and crunchy tea time snack!

Too few ingredients needed!

An awesome way to use up leftover bread. (Burger Buns in my case)!

Need I say more?

With such an effortless recipe, I should not take efforts of writing any more description here!
So here is the super quick recipe for all of u!

Level: Easy
Serves: 5 - 6 people

Ingredients:
2 Burger Buns (No toppings)
Sugar to taste (I used 1 pinch per piece)
Butter (Any kind)


Method:
Step 1 - Preheat oven to 270 Deg F

Step 2 - Separate each slice of the burger bun, if it is not pre-cut and smear butter or any butter-like spread over the top of each piece. Do not go over board here, but you do need to cover the entire top of the bread with butter.

Step 3 - Cut each slice into 2 or 3 lengthwise pieces. Sprinkle each piece with a pinch of granulated sugar. Arrange them on a baking tray.

Step 4 - Bake in the oven for 25-30 mins. Keep an eye on the beauties after 20 mins to avoid burger burns!

Let them cool.

Dip in some nice hot tea or coffee and enjoy!

Tips:
You can use any type of bread here. Just make sure you adjust the time taken in the oven based on the thickness of the bread.
Thinner bread = lesser time and vice versa.

Toppings are a no-no here, as they burn up in the oven. Sad personal experience!

Tuesday, February 15, 2011

Apple Pickle

Loads of apples, too tart to be enjoyed as a snack, not in a mood for an apple dessert! Believe it or not, this happens too often at our place.

Try searching for recipes with apples and google throws at you all the delicious tarts and pies and cakes. Just looking at the pictures makes you crave some calories. But with a lot of self control I typed in "apple savory recipes" and saw amazing images of apple pickles.
How interesting! But wouldn't it be all mushy and pulpy? The recipe claimed it did not. We weren't going to eat those tart apples anyway and the recipe looked too simple to be true. I decided that there was no harm in trying some apple pickle. And I was glad I did!

It almost tasted like Raw Mango pickle, just a tad bit sweet. This can be taken care of by addition of some white vinegar. I think its a must try! Maybe next time, I'll buy apples just to make some pickle!

Moreover, making homemade pickles has its own advantages. Firstly, I think it is super exciting to eat a fresh homemade pickle. Secondly, you can totally control the salt and oil getting into this. So great for calorie conscious or High Bloop Pressure candidates.

Just make sure you read the tips, right below the recipe before you try this apple pickle.

I say.. just go for it!

Level: Easy
Serves: 5 to 6 people ( If eaten as a pickle)


Ingredients:
3 medium green apples, chopped into tiny cubes
2 tsp red chilly powder
1 tsp fenugreek powder
3 pinches asafoetida
2 tsp vinegar
Salt to taste
3/4 tsp mustard seeds
2 tsp oil

Method:
Step 1 - Place the chopped apples in a large bowl. Add red chilly powder, fenugreek powder, 2 pinches asafoetida and salt. Mix well and adjust flavors to your taste. Leave this to marinate for 3 to 4 hours.

Step 2 - In a small pan, heat some oil. When the oil heats up, add in the mustard seeds and 1 pinch asafoetida and let them splutter. Immediately pour this into the apples and stir well.

If at this point, you think you need the pickle to be slightly sour, add in some vinegar and mix well.


Hope you enjoy making and eating this!
Happy cooking everyone!

Tips:
I used green apples, but there are recipes which have used red apples for pickles too.
Few recipes, call for peeling the apples before chopping, I did not do that. I think it looks prettier and holds shape better if we leave the apples skin-on.

Once you wash the apples before chopping them, make sure you wipe them dry with a tissue paper or a cloth. You want the apples to be as dry as possible. Water content, makes the pickle go bad quicker.

After chopping the apples, immediately go to Step 1. You dont want to wait for the apples to get discolored.


Saturday, January 22, 2011

Cilantro Jalapeno Hummus

I was first introduced to 'Hummus' by my brother in London. But back then, I did not know that there exists a variety of hummus flavors!
I was introduced to the world of hummus with different flavors only when I started visiting the farmers market here in california. I was absolutely amazed by the choices available. But being true to its farmers market trend, these were quite costly and we couldnt just keep buying them every week. Also, being absolutely tasty, these were gone almost always before we even reached home!

This is where I started looking up for hummus recipes everywhere. I realized that making home-made hummus is not a big deal after-all! All I had to do was go in search of a bottle of 'Tahini'. Indian stores everywhere carry one. If yours doesn't, head on to a store which sells middle-eastern food.

So without any hurdles, I decided to try making this dip for our upcoming party. And what a hit it was!
I was so thrilled with the final outcome, that I immediately started on the second batch and popped it in the freezer. I was just too sure we would need it soon!

I have decided to try most of my favorite hummus recipes one by one. Cilantro Jalapeno Hummus was on the top priority list. This will be soon followed by Eggplant Hummus, Garlic Hummus, Roasted Red Pepper Hummus, Chipotle Hummus...well the list goes on!

Here is how it is made.

Level: Easy
Serves: 2 soup bowls full


Ingredients:
3/4 cup coriander leaves/cilantro, roughly chopped
3 jalapenos, roughly chopped
2 cloves garlic
1.5 tblsp lime juice, freshly squeezed
1.5 tblsp water
4 tblsp tahini
2 tblsp olive oil (I used extra virgin)
1 can garbanzo beans/chickpeas, drained and washed
1/2 tsp cumin powder
1/2 tsp red chilly powder
Salt as per taste

Method:
Step 1 - In a small bowl, mix together the lemon juice and water. Keep aside.

Step 2 - In another bowl, mix together the tahini and olive oil. Keep aside.

Step 3 - In a food processor bowl, with the chopping attachment on, add the cilantro, jalapeno and garlic. Run the processor for a few seconds. Open it and push all the ingredients sticking to the sides, back in the center and pulse till they all are finely minced.

Step 4 - Add the garbanzo beans, 1/4 tsp salt, cumin powder and red chilly powder. Process again till everything combines well. This shouldnt take more than a minute. If you think the mixture is sticking to the sides of the bowl, open the processor and push everything down. You will have a nice green grainy mixture here.

Step 5 - With the processor running, pour in the lemon juice and water from step 1. Then pour in the tahini and olive oil from step 2 through the shute, in a steady stream. This will start making the hummus creamy. At this point if you think you would like the hummus to be more creamy, you can add in some more tahini. But tahini not being too heart friendly, I just add in some water, 1 tblsp at a time. You might have to stop processing and start scraping the sides of the bowl occasionally.

The end result would be a creamy light green, perfect hummus!

Serve with some toasted/fried/soft pita chips.
I served it with some homemade toasted garlic pita chips.
If you are serving this as a dip, smear it in a flattish bowl or a plate. Even out the top with the back of your spoon. Pour a little bit of olive oil over it, sprinkle some red chilly powder and throw a few coriander leaves on the top, just before serving. Makes a great presentation.


You can use it as a sandwich spread too.
You can use it for dipping your falafels in...
....The possibilities are endless!

Tips:
If you do not own a food processor, dont lose hope. Many recipes suggest doing this in a blender. Though I have not personally tried making this in a blender, I dont think it should be a problem, as finally we want a creamy, non-chunky hummus.

You will have to use canned garbanzo beans for this recipe. DO NOT use home boiled chickpeas. They just dont work. Unfortunately, I learnt this the hard way! Waste of ingredients...and efforts!

You can adjust the taste of hummus as per your liking. The recipe I made, makes a medium spicy hummus. So you can take it from there. Generally hummus requires a little more lemon juice, so you can work that in too. But I am not a big fan of tangy hummus.

The picture above, shows a double batch of hummus ingredients.

What's hummus?
Hummus is a middle-eastern dip that is made from chickpeas. In fact, hummus is the Arabic word for chickpea. It is mainly made of chickpeas and tahini, a paste similar in texture to peanut butter, but it is made of sesame seeds.
Because both chickpeas and sesame seeds are very healthy, hummus is a nutritionist's delight.
Chickpeas are a good source of protein, postassium and fiber. Sesame seeds are a good source of protein and vitamin E. It is also a great anti-oxidant.

So go ahead and indulge!

Friday, November 26, 2010

Homemade Ghee (Clarified Butter)

With Diwali gone by, I am all out of ghee!

With a couple of friends interested in knowing how to make homemade ghee, this post is for all you girls out there. Yea...Finally!

Now I used to buy ghee from the Indian Grocery Stores. Most of us do! But from the time I realized that it is real easy to make some at home...I never went back. There is this distinct pure flavor to the ghee made at home, that I totally adore!

And as we dont use ghee a lot in our food, due to health reasons of course, one bottle goes a long long way!

So let's get started...

Serves: Makes 1 large bottle
Level: Easy


Ingredients:
2 lbs unsalted butter
1 tblsp water
Pinch of salt, optional

Method:
Step 1 - In a large pot, place the unsalted butter and turn on the heat to medium. Let the butter slowly melt down.

Step 2 - Once the butter melts, turn the heat to low and let it come to a boil. Do not stir the butter from the base at any time during the entire cooking process. During the boiling process, the milk solids settle at the base of the pot. We dont want them to again mix with the butter. Afterall, clarified butter is what we are looking for.

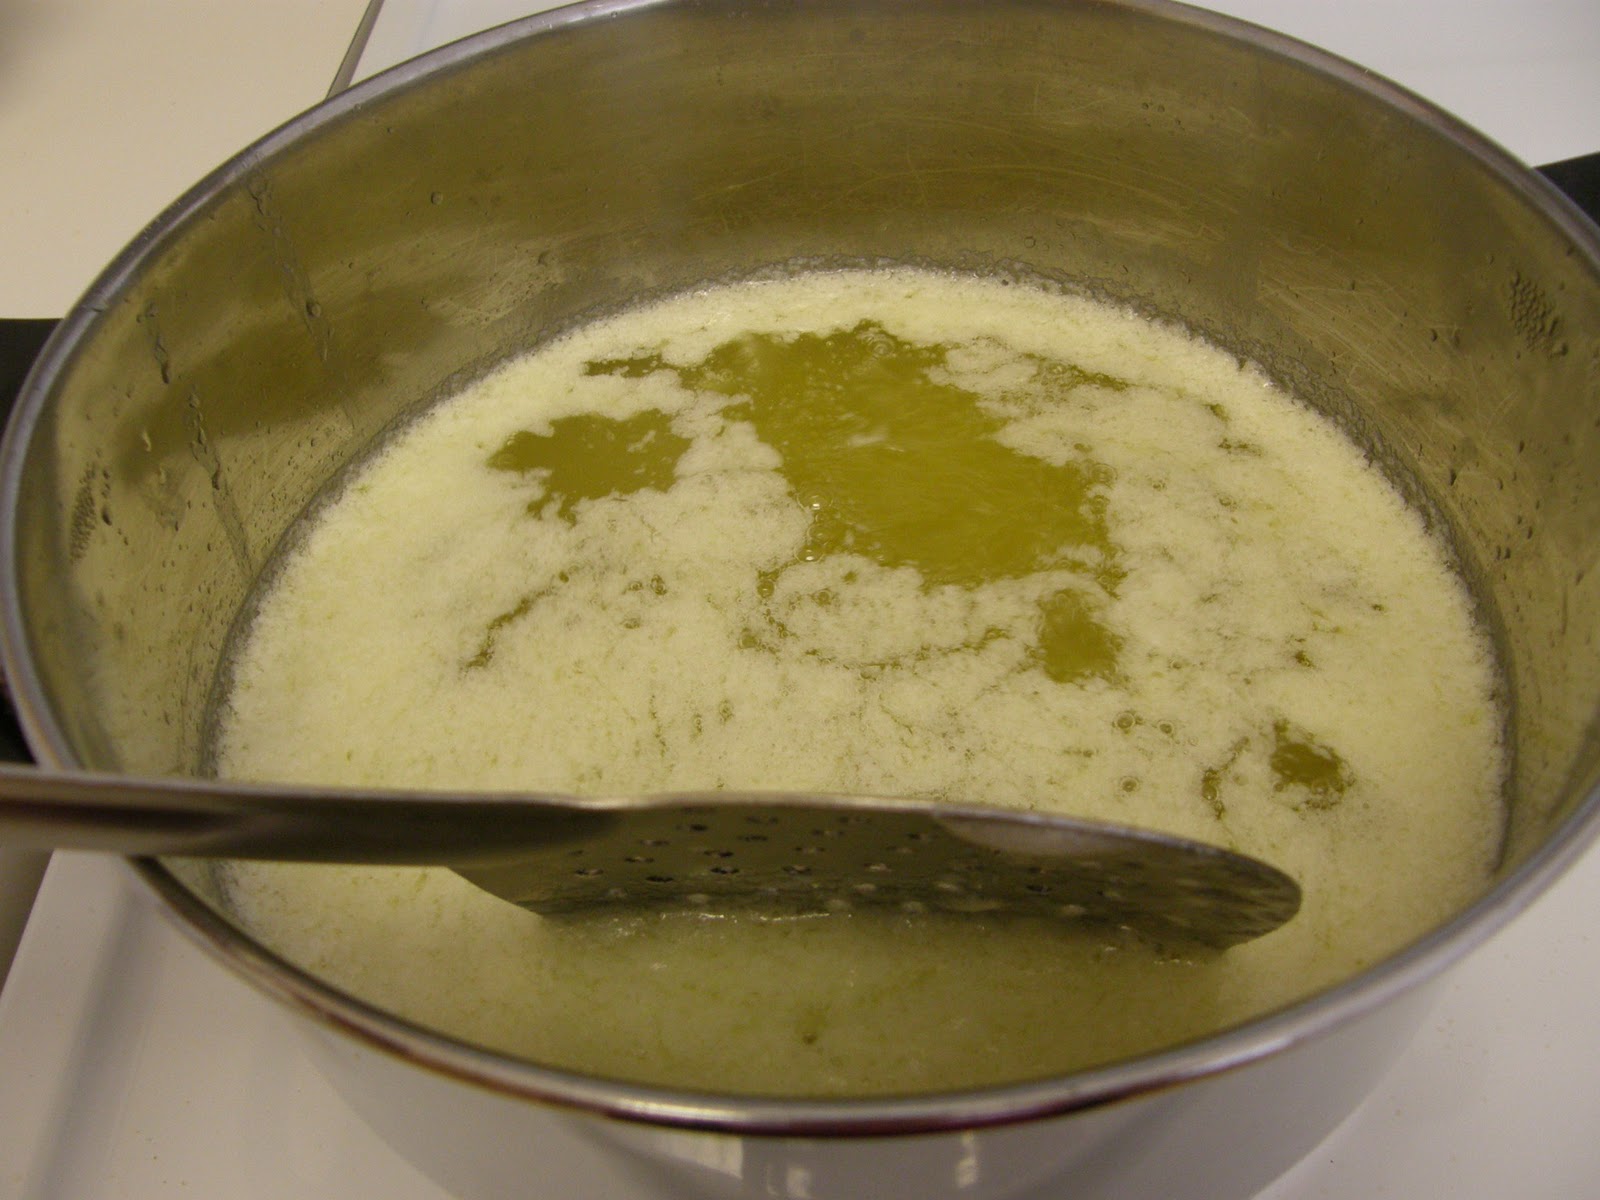
Step 3 - Once the butter boils for 10 mins, start lightly moving the foam away from the top of the butter to peep in. Our aim is to reach a good visual clarity. We should be able to see the bottom of the pan, with milk solids stuck to it. This is clarified butter (literally)!

Step 4 - Once the butter has reached a nice golden color and starts smelling like toffee/nutty, there will be a layer of foam on the top of this butter. At this point, take 1 tblsp of water and slowly pour this over the butter. Stand back when you do this. The foam starts popping and disappers. Now turn off the flame and let this mixture cool for around 20 to 30 mins. Do not let it completely cool down, as this will solidify the butter which then cannot be poured into a jar.

Step 5 - Strain the ghee into a clean and dry jar with a lid. I use a simple tea or coffee strainer to do this.

Step 6 - This is an optional step. If you prefer your ghee grainy, just add a pinch of salt to the ghee in your jar and stir well. By the time the ghee cools down, you will have a nice grainy clarified butter.

Done!


Tips:
Try and use an aluminium or steel or light colored pan to prepare ghee. If you use a dark pan, it is really difficult to see if the ghee has reached its desired golden color.

Use a slightly large pan, as when you add water to the butter, the foam rises a little to the top and you dont want it to be all messy on your counter top.

Use a really clean and dry jar to store ghee. This improves it's shelf life.

Happy cooking everyone!

Tuesday, June 22, 2010

Super quick pizza sauce (no cooking)

This is a really cool, super quick pizza sauce recipe, that I came across in www.allrecipes.com. All it mainly requires is tomato paste, oregano and olive oil. These are things that we might have in our pantry if we cook Italian food at home.

The recipe mentions, that this sauce can be used as marinara over pasta..but I personally think it wouldnt hit the mark, on pasta. You need fresh tomatoes for a good marinara sauce. Tinned stuff dont quite make it there. But of course, if you fall in love with this sauce, go ahead..pour over some pasta and have a good time.

Here's how it is made..

Level: Easy
Serves: Makes almost 3 cups of sauce

Ingredients:
1 can tomato paste (6 ounces)
1.5 to 2 cups water
1/3 cup olive oil
4 to 5 cloves of garlic, grated
Salt to taste
2 tsp ground black pepper
1.5 tsp oregano

Method:
Step 1 - In a bowl, add the tomato paste, olive oil and water. Mix well till all the liquids combine well.

Step 2 - Add the salt, pepper, oregano and garlic. Mix well. 

Done.


Real easy right? 

In the picture above, I have smeared this sauce over some sliced english muffins. Have topped it with onions, bell peppers, corn and of course some cheese. Baked in a 350 Deg. F. oven for 13 - 15 mins or till the base looks crusty on the sides. Makes a great appetizer for a party.

Enjoy!

Tips:
You can adjust the quantity of garlic as per your liking. 

Any kind of dried italian herbs would work in this recipe. I had oregano at home and so I used it. If you have rosemary or basil or even assorted just add it in. It may change the flavor a bit, but will still be yum!


Sunday, February 21, 2010

Green chutney (for potato toast filling)

Heres the recipe for our potato toast filling.
Just like all the chutneys, this tastes great even as a sandwich spread.


Level: Easy
Serves: Makes almost 2 cups

Ingredients:
1.5 cups fresh grated coconut
1 cup coriander leaves
8-10 green chillies, or as per taste
1 raw mango / 1 lemon
1 tsp cumin seeds
1 tsp sugar
Salt to taste

Method:
Step 1: Grind all in a mixer with almost NO WATER at all..we need this to be really dry to be used as a filling.


Ideally this mixture should get ground with the water already present in the fresh coconut. In case your grated coconut is not so fresh or is dry...add in very little water to make sure it grinds together.

This tastes awesome as a sandwich spread too...so I always make some extra and use it as and when required. Just make sure you dont keep it too long..as the coconut might go bad.

I have used the entire raw mango shown in the pic, cause it just wasnt sour. You should taste your raw mango, before deciding how much needs to be added in the coconut. We dont want to end up with a sour chutney.